Hair System Maintenance: A Complete Guide
Hair system maintenance is not just challenging for beginners; even many experienced wearers don't realize how much everyday habits affect how their system looks and how long it lasts. The way you clean it, attach it, style it, and handle it day to day all make the difference in how natural it looks and how long it lasts.
This guide walks through what actually matters, how to attach and remove your system properly, how to wash and style it without causing damage, and the small daily habits that protect it over time. Once maintenance becomes part of your routine, it no longer feels complicated.
How to attach a hair system
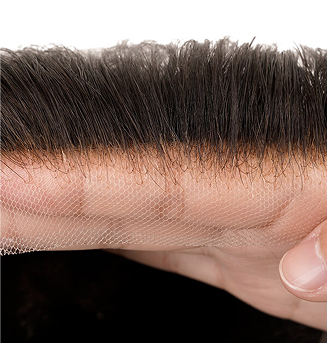
Getting the attachment right is the foundation of natural appearance. There are two main ways to attach a hair system: tape and glue.
If you're just starting out, tape is generally easier to work with. Glue offers a stronger and longer hold once you get the hang of it.
Glue works great on skin bases. While for lace and mono, go with tape. Glue seeps into the mesh, and once it's in there, it's really difficult to clean out. Over time, that buildup will cause shedding and shorten your hair system's lifespan.
Both hair system adhesives work well, and the right choice depends on your lifestyle and the type of hair system you are wearing.
Applying Your Hair System with Glue
Hair system glue gives you a cleaner and more seamless hold, especially around the hairline. Once you get the process done correctly, it can become invisible.
Step 1: Prep Your Scalp
Before anything else, get your scalp clean. Remove any leftover glue residue from your last wear. Apply a skin protector to clear away any remaining oils. This is what helps the glue actually stick and stay.
Step 2: Apply the Glue
Apply small dots of glue across the scalp. Less is more. If too much, it won't cure properly. You can use a toothpick to spread it into a thin, even coat. Let it dry for five minutes. When it's tacky, you're ready.
Step 3: Position and Press
Line up three to three or four fingers above your eyebrows. That's where your hairline should sit. Press the system down firmly and evenly. You can wrap a hair band around the perimeter, and let it cure for 15 minutes.
Step 4: Clean Up the Hairline
Don't touch the hairline until the system has fully set. Coming back after 15 minutes gives you a clean, precise edge without glue smearing everywhere.
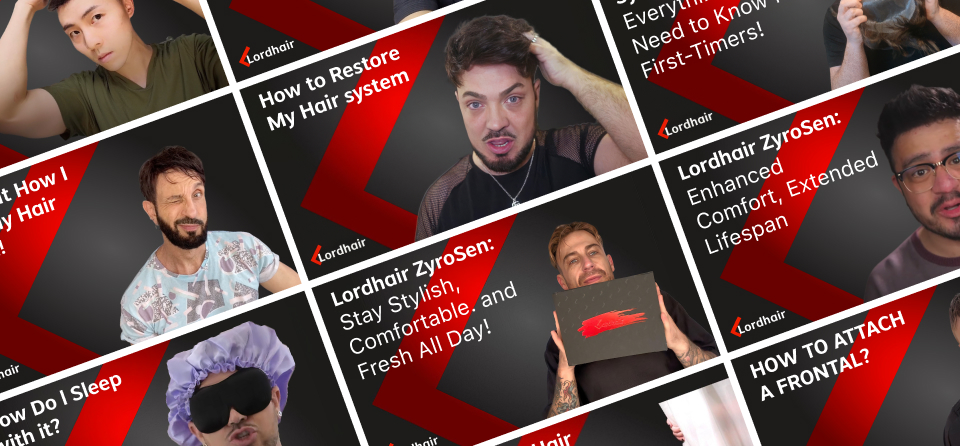
Watch how to attach a hair system with glue in action:
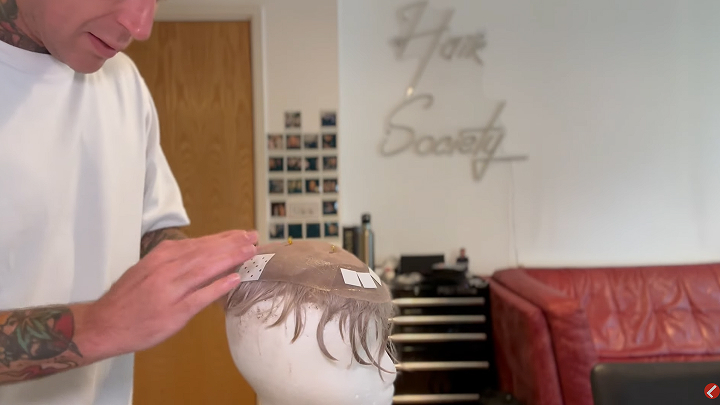
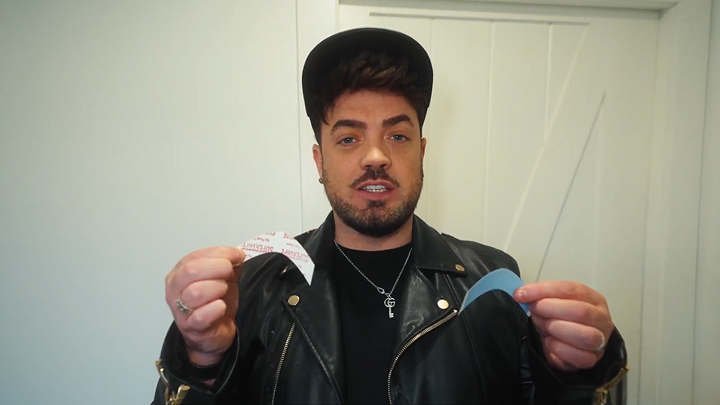
Applying Your Hair System with Tape
Hair system tape is fast and convenient to use. It offers simple attachment, removal and cleaning. It is a great starting point if you're new to hair systems. Tape is available in a variety of strengths, giving you the flexibility to accurately control the duration of the hold.
Step 1: Prep Your Scalp
Make sure both the scalp and the hair system base are clean, dry, and free of grease and oil. Remove any stubble/hair from the area of scalp to be bonded.
Step 2: Mark Your Hairline
Use a light-colored eyebrow pencil to mark where your hairline should sit. This is your guide for positioning the system, so take a moment to get it right before you start applying tape.
Step 3: Apply the Tape
Apply tape around the perimeter of the base. Work around the edges carefully, keeping the tape right on the border. Leave the front hairline for last after the rest of the system is already in place.
Step 4: Position and Press
Lift the back of the system with your fingers, and line up the front of the system with your marked hairline. Then bring the sides down and slowly work your way back, using your fingers to keep the hair clear of the tape as you go. Once everything is in place, press down firmly.
Step 5: Blend and Style
Wipe off any pencil marks, brush the hair to blend with your own, and it's done.
Watch how to attach a hair system with tape in action:
FAQs for Hair System Installation
Tape or glue, which one should I use?
If you're just starting out, tape is the easier choice. It's simpler to apply, more forgiving, and easier to clean up. Glue gives you a cleaner and less detectable finish around the hairline, but takes more patience to apply correctly.
Glue works great on skin bases. But tape is a better choice for lace and mono, since glue seeps into the mesh, making it difficult to clean out. Leave it long enough, and that buildup will cause shedding and shorten your hair system's lifespan.
For a detailed comparison, watch this video.
Can I use tape and glue at the same time?
Yes, and many experienced wearers do. A common approach is using tape around the perimeter for security and glue along the front hairline for a cleaner, more natural finish. Mixing both gives you the best of each method.
What's the best adhesive for beginners?
Tape is the easier starting point. It's more forgiving, simpler to apply, and easier to remove and clean than glue. Pre-cut contour tapes are especially beginner-friendly since they're already shaped to fit the common contours of a hair system.
Where do I position my hairline with the hair system?
In general, the hairline is usually 3-4 fingers above your eyebrows. The natural-looking hairline should begin where your natural hairline began. You should never place the front of the hair system on your frown line, that is too low. Look in a mirror, and visually, your fingers should tell if they're on your forehead or at the front of your scalp.
How often do I need to reattach?
Hair system adhesive typically lasts between 2 to 4 weeks for most users. How long it actually lasts depends on daily maintenance and your lifestyle. If you are active and sweat a lot, you may need to reattach it more frequently. If you stay dry and cool, it can last relatively longer.
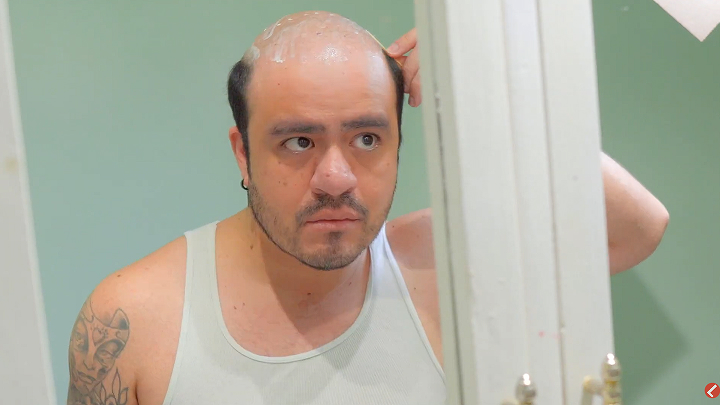
How to clean and remove a hair system
A General Process
It is recommended to remove the hair system and conduct a deep cleaning after wearing it for two weeks. It sounds like a lot of work at first. Given it time for practice, you will get used to the process, and it will become part of your daily routine. Here's a general process on how to do it.
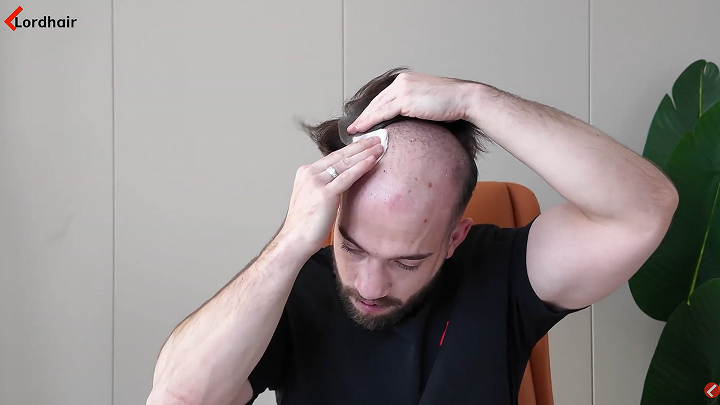
Step 1: Remove the System
Add a few pumps of adhesive remover like C22 to a cotton pad and wipe it onto your scalp while slowly lifting the hair system off. Take your time here, and there's no need to rush or pull. If you feel any resistance, add more solvent to the cotton pad and let it work before continuing. Once the system is off, spray C22 directly onto the base and pat it down. Let it sit for a moment before peeling the tape away.
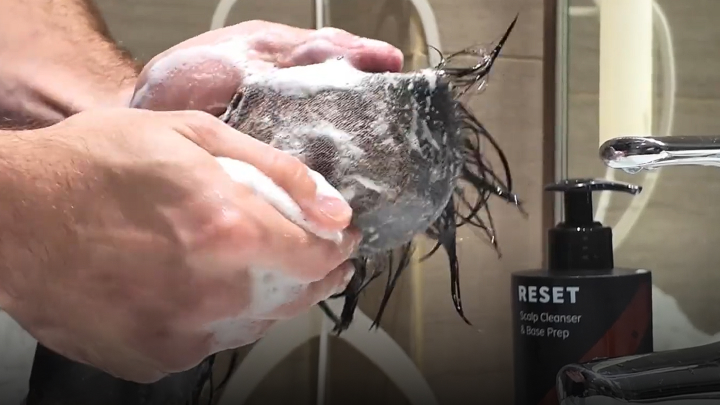
Step 2: Wash the Base
Place the system in lukewarm water and add a few pumps of RESET, Lordhair's gentle cleanser designed specifically for hair systems.
Regular shampoo is too harsh for hair systems. It strips moisture and can damage the base over time. Massage RESET into the base using circular motions, then rinse and repeat two to three times until the base is completely clean and ready for reattachment.
Keep your base type in mind during this step:
- Thin skin: Be gentle with your fingertips and never twist or bend the base
- Full lace: Support the lace with your palm and use light circular motions, no scrubbing
- Hybrid: Treat each section according to its material and pay extra attention to the edges where adhesive tends to build up
Step 3: Condition the Hair
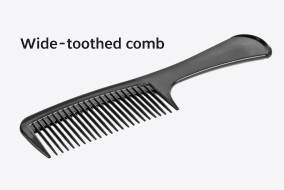
Once the base is clean, gently comb through the hair with a wide-tooth comb, working away from the base to avoid loosening knots. Apply RENEWAL evenly through the hair. Renewal is a conditioning mask restores moisture and softness that the hair loses over time. Leave it in for three to five minutes, then rinse with lukewarm water and comb through once more.
Step 4: Dry Carefully
Place the hair system on a towel and press down gently to absorb the water, no wringing or twisting. Then let the hair system air dry. If you want to use a hair dryer, use cool heat, not hot. Brush through again to make sure there are no knots before moving on.
Step 5: Apply leave-in conditioner
Once the system is about 80% dry, apply a light mist of REFRESH, a leave-in conditioner, to lock in moisture and protect the hair from dryness and heat. This keeps the hair soft, smooth, and easy to style.
Watch how to remove a hair system in action:
Above is a general cleaning process for hair system cleaning. Different hair system bases have different features that require special attention during cleaning. For details on how to clean lace, skin, and hybrid hair systems, watch these step-by-step guides.
 How to Maintain a Hybrid Base Hair System
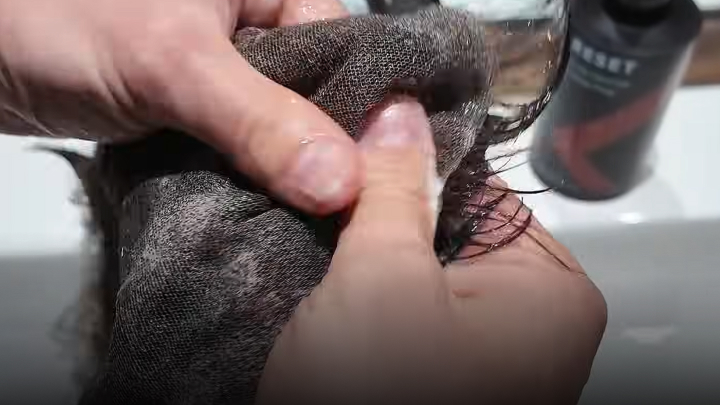 How to Maintain a Full Lace Hair System
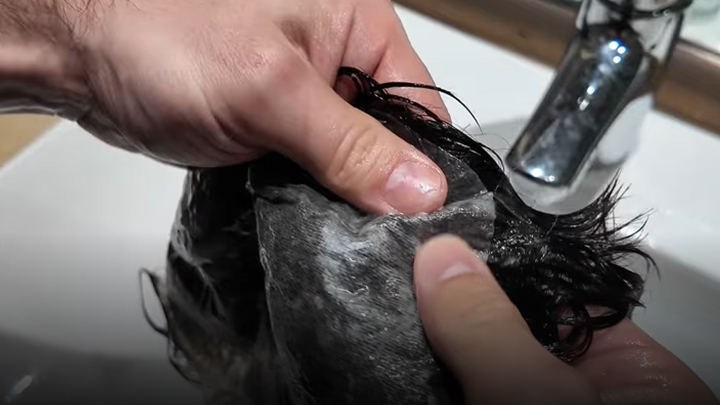 How to Maintain a Thin Skin Hair System
The Best Shampoo and Conditioner for Hair Systems
Most shampoos and conditioners you find in stores are made for natural hair. They are not designed for hair systems. This is one of the reasons many wearers end up dealing with dryness, tangling, and shedding earlier than expected. In many cases, the problem is not the hair system itself. It is the products being used on it.
Why Regular Products Don't Work
Natural hair gets oils from the scalp, but a hair system doesn't.
Once the hair starts losing moisture, it will not recover on its own. You have to add the moisture back through the right care routine and the right products.
Regular shampoos usually contain sulfates or other harsh cleansing agents that strip away moisture, leaving the hair feeling dry, rough, and harder to manage over time. It can also affect the base material. If the ingredients are too harsh, they may weaken the base and shorten the lifespan of the system faster than normal wear would.
Conditioners can also fall short. Regular conditions are made to support hair that still benefits from the scalp's natural oil. Hair systems have different needs, so they usually need richer and more targeted moisture care.
The Lordhair 3R Collection
After years of testing and feedback from real wearers, Lordhair developed the Hair System Maintenance Collection specifically for hair systems.
The Lordhair Hair System Maintenance Collection consists of three products: RESET, RENEWAL, and REFRESH.
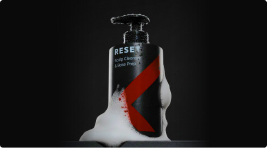
RESET - Scalp Cleanser and Base Prep
RESET works as a shampoo replacement for hair system wearers. It removes adhesive buildup, oil, and residue without stripping the hair or putting unnecessary stress on the base. RESET is gentle to the base while still cleaning thoroughly.
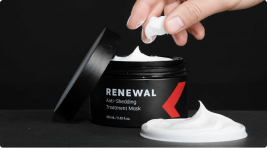
RENEWAL - Anti-Shedding Treatment Mask
RENEWAL is a rich treatment that locks in moisture to prevent hair dryness, shedding, and tangling. Its nourishing formula not only moisturizes your hair, but also keeps your hair system super clean, so you will have that brand new feeling back in your hair system.
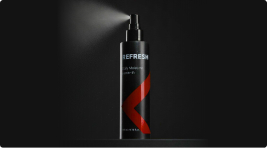
REFRESH - Daily Moisture Leave-In Spray
REFRESH is made for daily use between washes. A quick spray in the morning helps keep the hair soft, hydrated, and easier to style. It also helps reduce tangling and adds protection against heat and sun exposure.
For more information about Lordhair Maintenance Collection, read this article: Say Goodbye to Hair System Struggles: Meet Lordhair Hair System Maintenance Collection.
FAQs for Cleaning Hair Systems
Does removing a hair system hurt?
It shouldn't. If it does, it usually means you're pulling too hard or not using enough solvent. Apply adhesive remover to a cotton pad and let it work before lifting. Take your time and the system should come off without any discomfort.
How do I remove a hair system without damaging the base?
Always use a solvent and work slowly from the edges inward. If you feel any resistance at any point, stop and add more solvent rather than forcing it. A little more patience here can protect the base from tears and stretching.
Will removing my hair system too often shorten its lifespan?
Frequent removal does add wear over time, especially on delicate bases like ultra-thin skin or full swiss lace. That said, regular removal is necessary for proper cleaning and scalp health. The key is making sure every removal is done carefully with the right process. Rough removal causes more damage than frequent removal.
How often should I clean my hair system?
Every two weeks works for most wearers. If you work out regularly, live in a humid climate, or sweat a lot, you may need to clean it more frequently. Note that washing too often can dry the hair out faster, so don't overdo it.
Can I use regular shampoo on my hair system?
It's best to avoid it. Regular shampoos are formulated for natural hair, which produces its own oils to stay hydrated. Hair systems don't have that, so harsh shampoos strip the moisture and weaken the base over time.
Why does my hair system feel dry and rough after washing?
This usually means the hair isn't getting enough moisture. Hair systems don't produce natural oils, so they need conditioning every single wash. Make sure you're applying a deep conditioning treatment like RENEWAL after every clean and letting it sit for at least three to five minutes before rinsing.
How do I prevent shedding when cleaning?
Always detangle gently with a wide-tooth comb before washing, starting from the ends and working up toward the base. Never brush when the hair is soaking wet. Avoid scrubbing the base, and use light circular motions instead. Rough handling during cleaning is one of the main causes of shedding.
Can I use a hair dryer to dry my hair system?
Yes, but keep it on cool or low heat. High heat weakens the hair and can damage the base material. If you're in a rush, cool air from a hair dryer is fine. Otherwise, letting it air dry naturally is the best solution.
How do I keep my hair system from tangling between washes?
A daily spritz of a leave-in conditioner like REFRESH goes a long way. It keeps the hair hydrated, reduces friction, and makes it much easier to manage day to day. A quick mist every morning before styling takes seconds and makes a noticeable difference over time.
My base still feels sticky after washing. What am I doing wrong?
Sticky residue usually means the adhesive wasn't fully broken down before washing. Go back and apply more solvent directly to the base, let it sit for a few minutes, then wash again with your cleanser. Repeating the wash cycle two to three times also helps.
How to style a hair system
Once your hair system is attached, styling is what brings it to life. Proper styling doesn't only cover hair loss; it improves your overall appearance.
In this part, we will discuss how to style your hair system for a natural look.
Before Choosing a Hair System Haircut
When it comes to styling, the most important thing is picking a haircut that suits your preferences and your lifestyle. Before making a choice, first think about the following questions:
How do I want my hair system haircut to be?
Think about what works for your face shape and lifestyle, and how much time you want to spend styling each morning. Shorter styles usually require low maintenance and are easy to manage day to day. If you're not sure where to start, choose a hairstyle that is close to your natural hair. It will blend in well and be easy to maintain.
How do I need to cut my own (aka bio) hair to accommodate my hair system?
The sides and back of your bio hair should be tapered or faded to match the density and length of the system. A gradual fade works best for most wearers. It creates a natural blend without drawing attention to where the system starts and your own hair begins.
Where shall I get a haircut: use Lordhair haircut service, go to a salon, or do it by myself?
Lordhair offers a pre-cut service where your system arrives ready to wear. A salon is worth considering if you can find a stylist experienced with hair systems. Doing it yourself is possible if you're an experienced wearer. But if you are a beginner, cutting a hair system by yourself can be very complicated as there are risks of damaging it.
Lordhair's Hair System Haircut Service
Lordhair offers haircut service, so the hair systems are ready to wear when they arrive.
Here is how to use the Lordhair haircut service for ready-to-wear and custom hair systems.
How to order haircuts for ready-to-wear toupees
Select your desired hair system from the stock hairpieces.
On the product page, you can choose the Haircut service. There are four options to customize a toupee haircut.
- Choose your hairstyle: Choose from a number of preset hairstyles, and you will get the hairstyle as shown in the image.
- I want to order my length: Select the length of each section of your head. This is useful if you have specific requirements.
- I'll send an email to Lordhair: You can send an email to support@lordhair.com to order a haircut. Make sure to quote your order number in your email for identification.
- Upload hairstyle images you want: Upload an image of the hairstyle you wish to have, and the hairpiece will be styled according to it. It is recommended to upload images from different angles for a precise haircut.

You can also order a stock hair system by hairstyle. On the Lordhair website, hover over the Hair System tab and choose By hairstyle. Then you can choose a pre-cut hairpiece with the hairstyle you like.

How to order haircuts for custom toupees
Go to the custom hair system page, where you can see details about Lordhair custom hair systems and real customer reviews.
Click the "Create My Custom Hair System" button on the banner to go to the customization page.

Fill in all the customization options, including the haircut. After finishing, add it to your shopping cart, where you can place an order and check out.

All Lordhair precut hairpieces are styled by expert stylists with over 15 years of experience, which ensures users get the most natural look they desire. However, hair can shift a little during shipping, so when it arrives, it might just need a little adjustment to get it back into shape. If something looks off, don't panic, just get in touch with the Lordhair support team, and they'll take care of you.
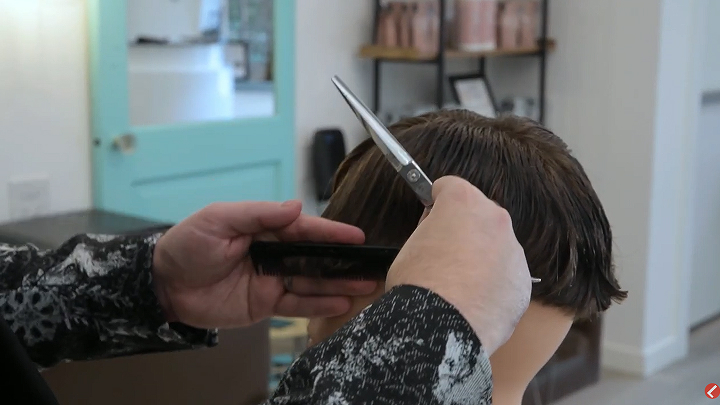
How to Cut and Style a Hair System
A lot of people feel that cutting their hair system is intimidating. But with the right tools and a little patience, you can manage it.
What You Need
You're going to need sharp scissors, texturizing scissors, a detangling brush, water spray, detangling spray, and trust me, get yourself a mannequin head if you're doing this alone. It makes the whole thing much easier, and it's really not expensive.
Step 1: Set Up the Hair System
Tape your system around the perimeter and the center so it stays put on the mannequin. Line up the front right at the hairline, make sure everything's centered, then roll it back. Now spritz the hair down with water and detangling spray before you touch the scissors. Wet hair is so much easier to cut cleanly.
Step 2: Cut the Perimeter
Part the hair right down the middle. Starting from the side, follow the contour of the head about an inch to an inch and a half from the base edge, all the way around. For the front, use the bridge of the nose as your length guide. And please cut less than you think you need. You can always take more off, but you can't put it back.
Step 3: Add Layers
At the back, lift your sections diagonally upward and round off the ends following the curve of your fingers. Keep working toward the front, angling slightly back as you go. This is what gives you that gorgeous natural sweep at the front.
Step 4: Texturize
This is the step that makes everything look natural and blend well. Texturizing scissors on the ends only, never at the root, or you'll end up with choppy patches. Do a little test snip first to see how much hair your scissors take out, then work your way through section by section.
Watch the full video to see each step in action.
Getting a Salon Cut
If you want to put your hair system in the hands of a professional, going to a salon is a good choice. Before you book, you should be clear about what you need. Not every salon works with hair systems, so it's worth a quick call ahead of time.
Tips to keep in mind: Some salons will want to do the fitting themselves before they cut and style the system. Others are happy to cut it after you've attached it yourself. Either way, asking them beforehand saves everyone time.

Where to Find a Salon for Men's Hair System Styling?
Lordhair works with trained stylists around the world who know exactly how to fit and style hair systems, which saves you the hassle of finding a salon through random search.
Thousands of hair system users visit our partner salons regularly for hair system attachment and maintenance. We are forging strategic partnerships with renowned salons in the USA, UK, Canada, France, and many other countries to give our customers a world-class experience. Here's how to find one:
Purchase your system at lordhair.com, then reach out to your customer service rep with your order number, and they'll point you to the nearest accredited salon. From there, just book directly with them.
What if there is no Lordhair hair replacement salon near me?
Don't worry. Hair replacement fittings may be just a Google away. Lordhair is unable to give out any recommendations of salons that have not been vetted by us, but that doesn't mean there are not any in your area. We advise you to ring up around your local area to see which salons might be able to fit your toupee.
Lordhair is actively expanding our global salon network, and you can expect to see the list grow in the future. We also welcome you to recommend your local salon so we can collaborate with them and provide you with more comprehensive services. If your recommended salon becomes our collaborator, we will pay you a referral fee.
I am a salon and want to partner with Lordhair
If you work with hair systems and want to partner with Lordhair, get in touch - we'd love to hear from you!
Lordhair Haircuts vs Salon Haircuts vs DIY Haircuts
| Lordhair Cut & Style Service | Cutting at a Salon | Cutting by Yourself at Home | |
|---|---|---|---|
| Professionalism of cut | Expertly cut | Expertly cut | Not professional |
| requirement to leave the house | No need to leave the house to get cut | Need to leave the house to get cut | No need to leave the house to get cut |
| Ease of process | No fuss - you don't need to leave the house, or take time to cut yourself - pick a hairstyle and voila! | Hair cutting takes time and it is done when the piece is on the head | Mess and extra time taken due to cutting a hair system at home |
| Blend with natural hair | Your own hair will need to be cut if too long - by you or a salon | Salon blends hair perfectly with bio hair | Difficult to create a hair system/bio hair blend at the back of the head |
| Price | $40 | $100+ | Free |
| Risk | Low | Low | High |
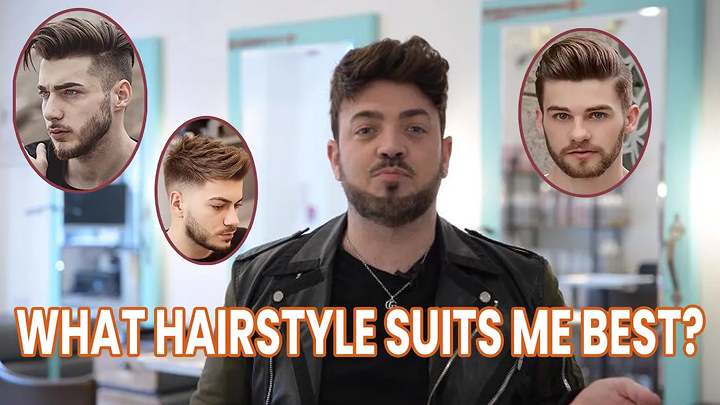
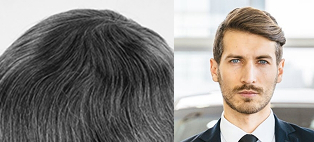
How to Choose a Hairstyle for Men's Hair Systems
One of the most exciting parts of wearing a hair system is that you can choose exactly how you want your hair to look. Whatever length, texture, or style you couldn't do with your natural hair, you can actually have it now. So take your time to pick something you're going to love. Here are some tips to help you make a smart choice.
Match Your Face Shape
Not sure where to start? Face shape can be a great place to begin. Check out the video below where celebrity hairstylist Aaron walks you through which haircuts work best for different face shapes. It will make the whole decision a lot easier.
Choose a Haircut Length
Once you have a general direction, length is the next thing to consider. We've put together a full list of Lordhair haircuts with the corresponding lengths for each section of the hair. Use it as a reference and adjust based on what feels right for you.
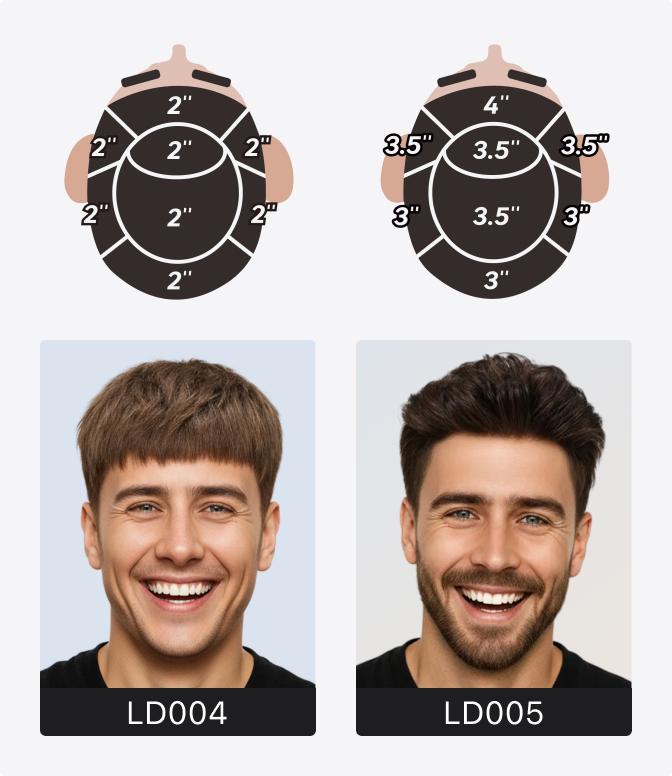
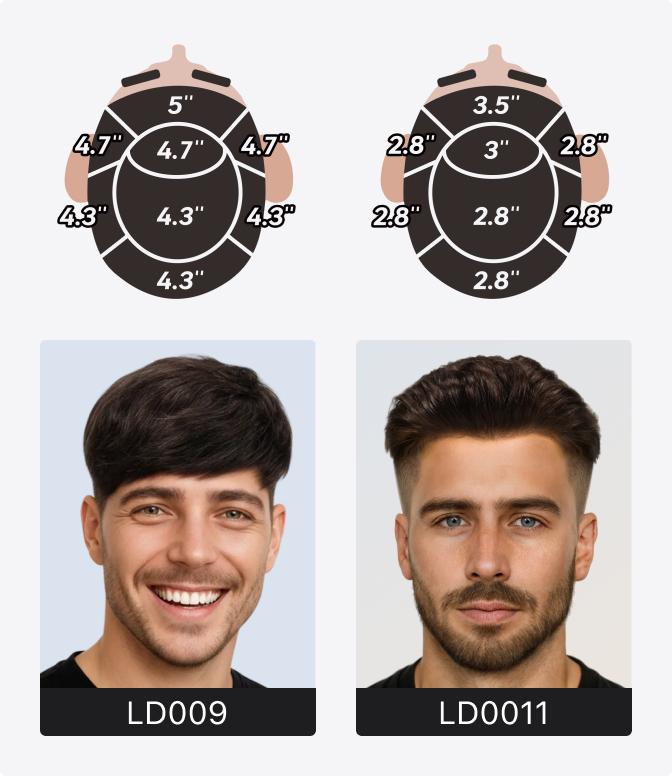
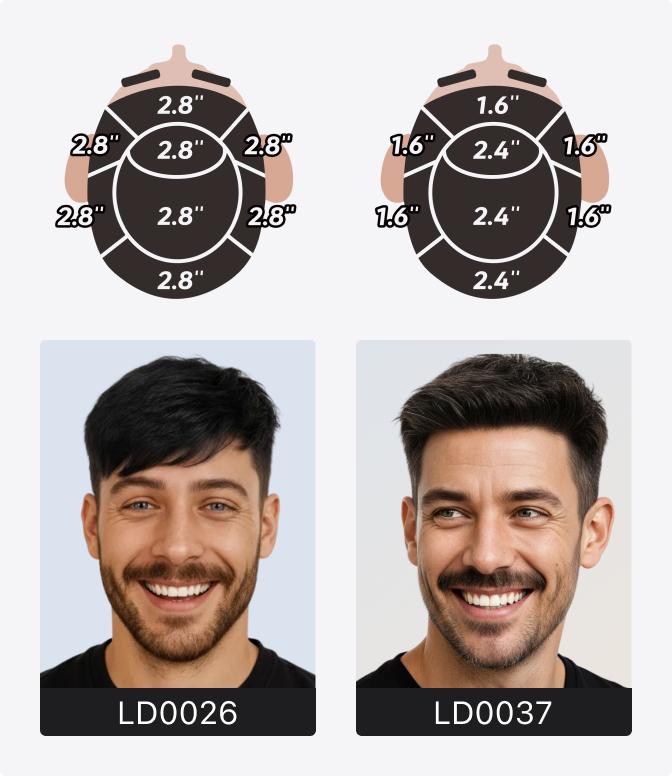
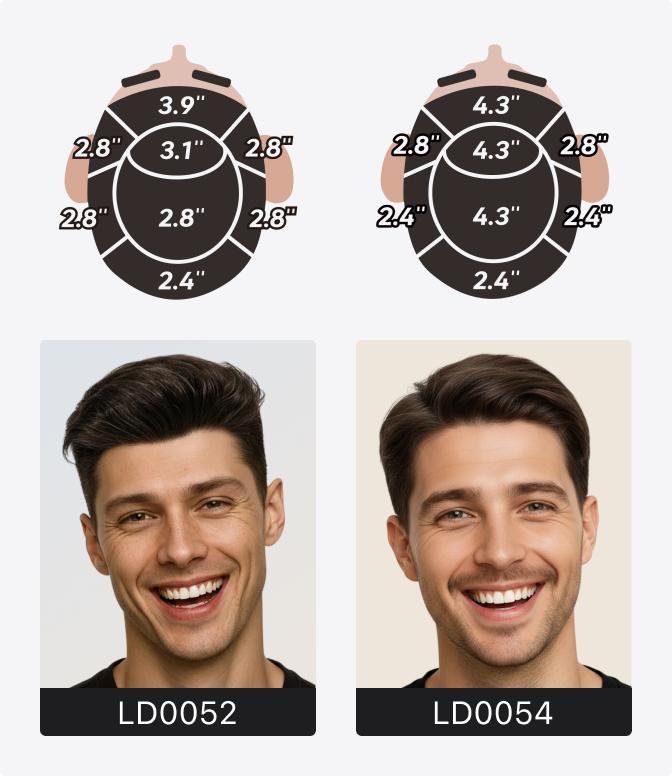
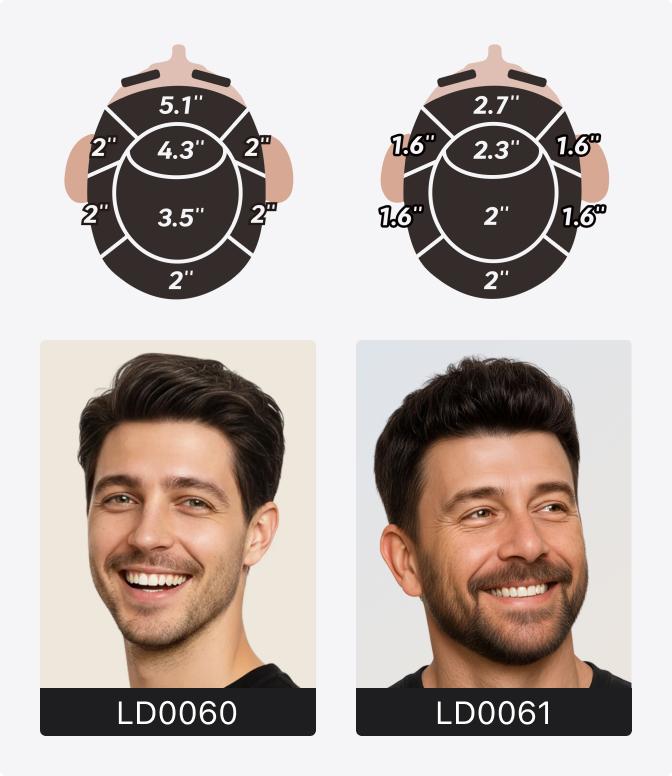
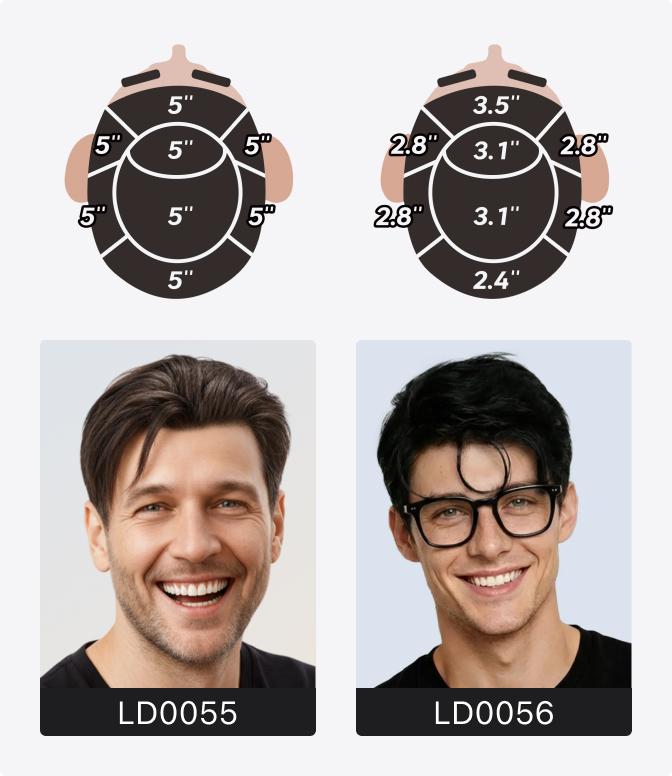
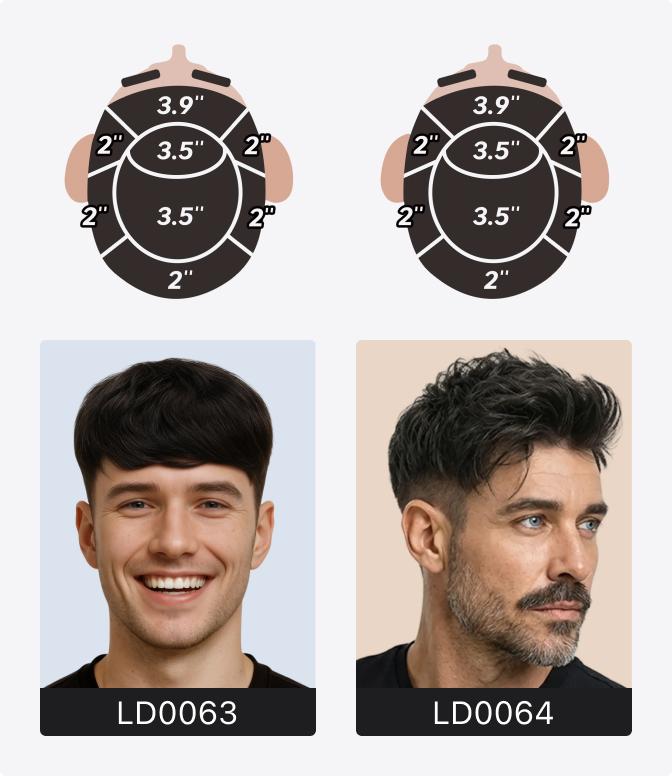
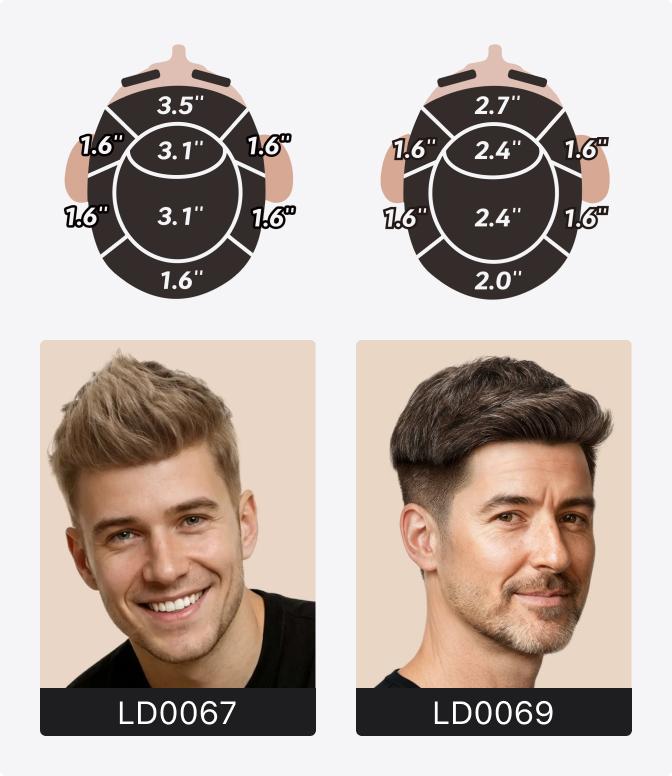
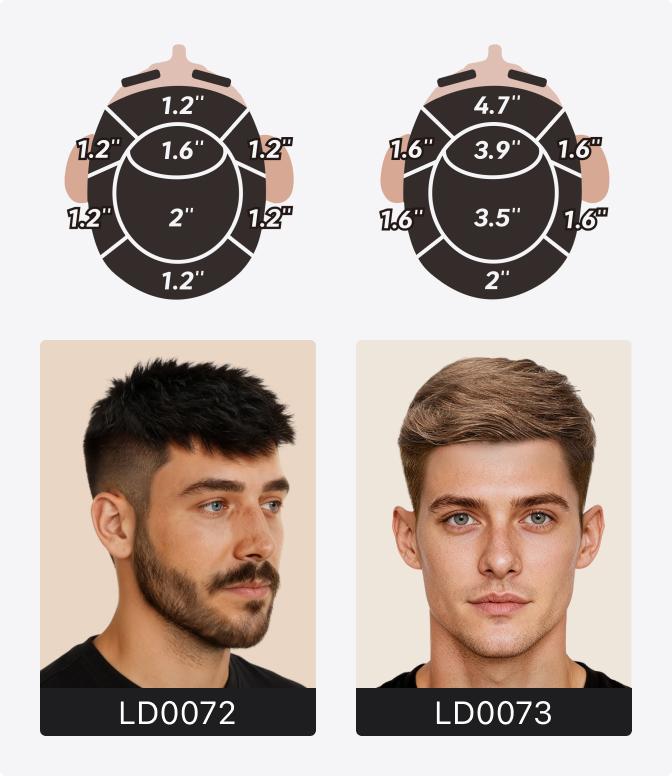
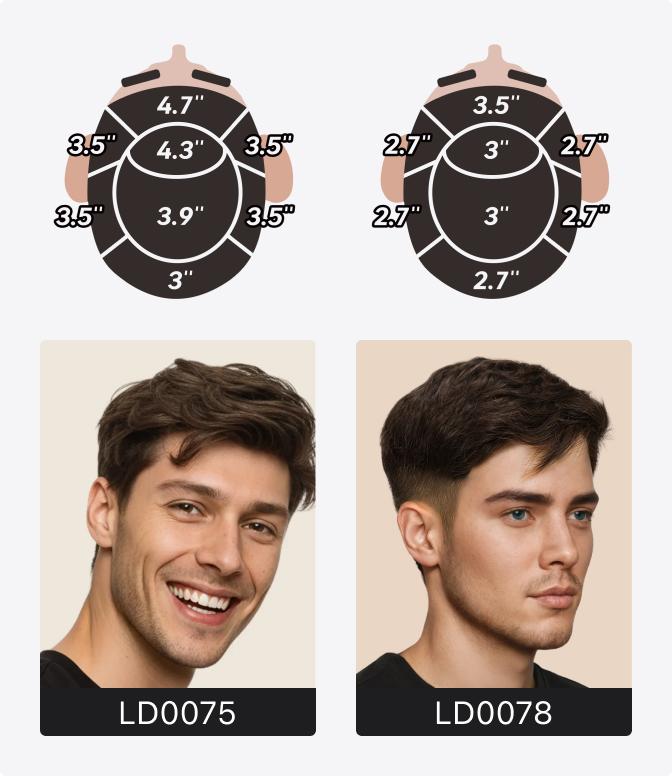
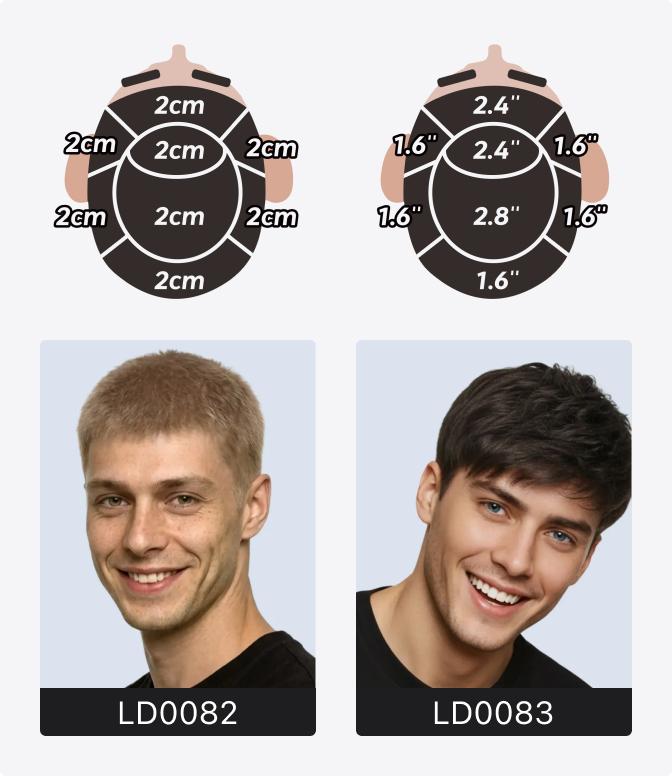

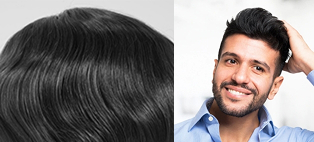
Popular Lordhair Men's Hair System Hairstyles
There are so many gorgeous hairstyles for hair systems at Lordhair, but these are the ones our wearers love the most right now.
Men's Side-Swept Bangs With Layers
This men's hair system hair style is a slightly longer hair style with bangs that are swept to the side. It is especially popular amongst Asians and Caucasian men going for that indie hairstyle.
To achieve a side-swept bangs hairstyle for men, choose style LD009.

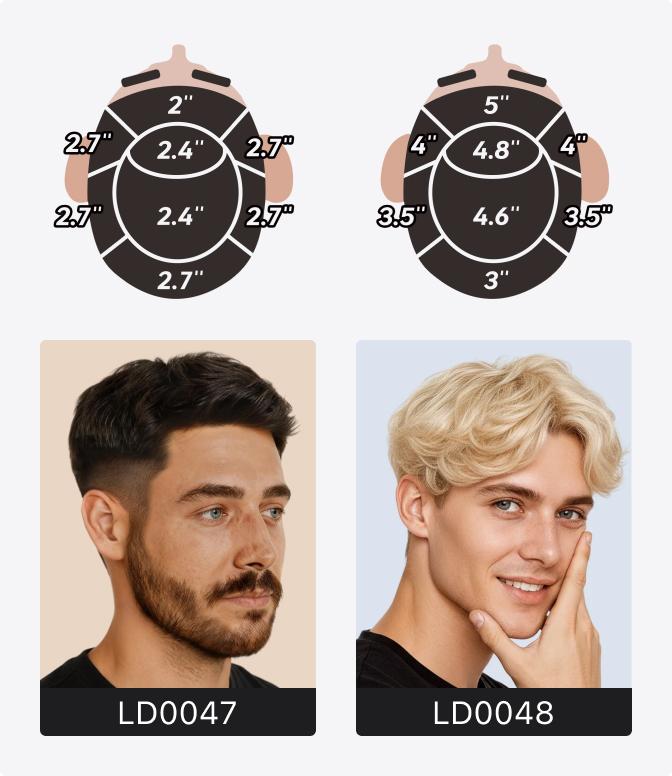
French Crop Men's Hairstyle
A men's French crop haircut is a hairstyle that has a shorter back and sides, with a longer fringe at the front, which hangs over the forehead, or can be slightly swept to the side. It allows you to get a lot of hair and volume at the top of the head.
To achieve a French crop hairstyle for men, choose style LD0047.
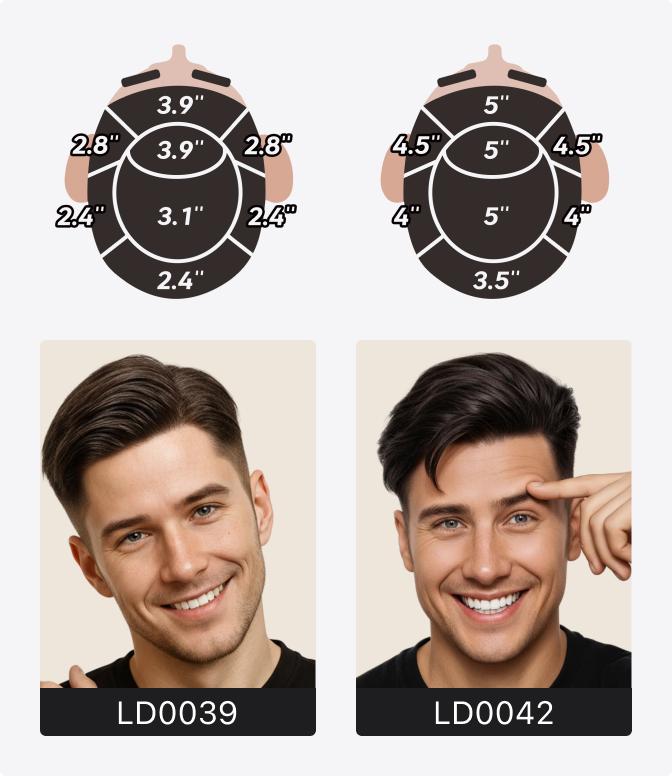
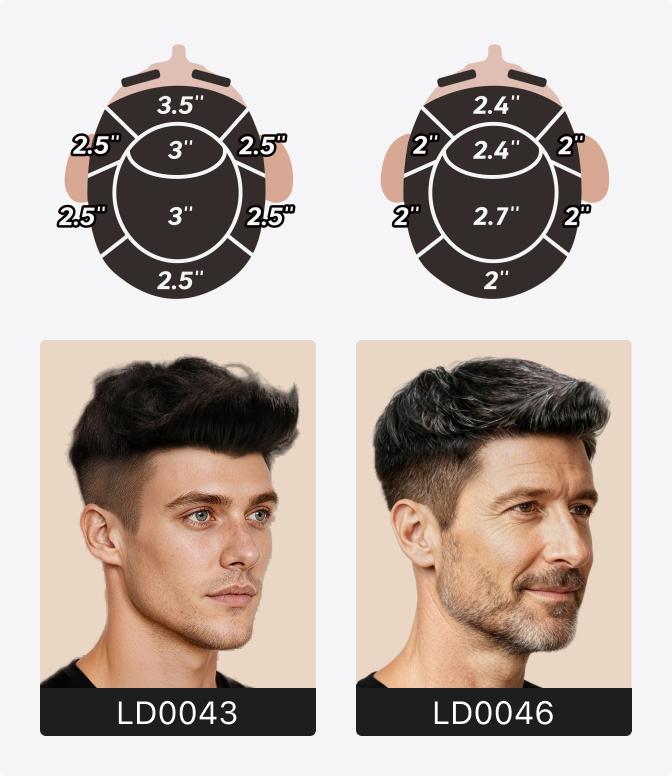
The David Beckham Hair Style Circa 2000
This hairstyle emulates the ultra-famous and iconic David Beck haircut back in his heyday, and it is still favored by many men today. Clean, sharp, and timeless. Classic for a reason.
To achieve a David Beckham hairstyle, choose style LD0043.
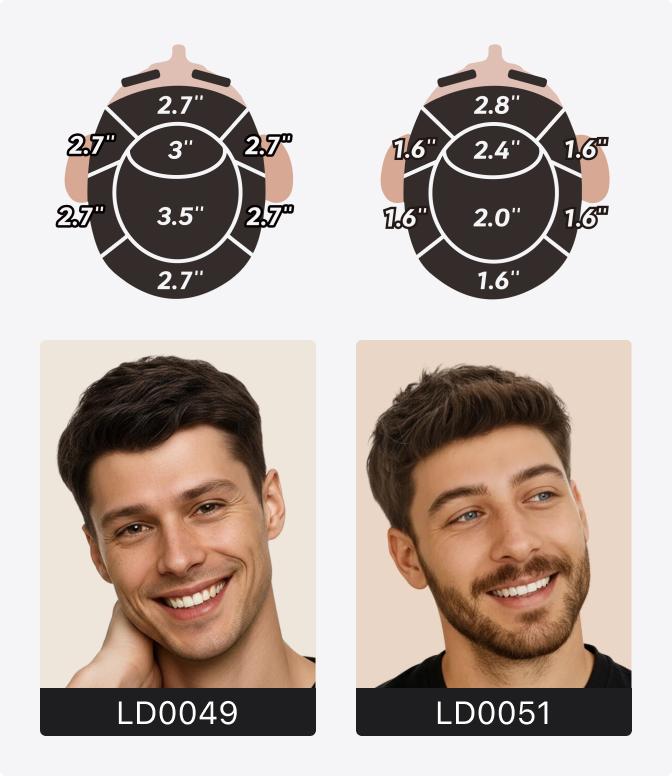
Crew Cut Hairstyle
A crew cut is short all over with a little extra length at the front, just enough to brush upward into a subtle, slightly lifted finish. Low maintenance, and it works on pretty much everyone.
To achieve a crew cut hairstyle for men, choose style LD0051.
Still not sure what suits you with thinning hair? Check out this complete guide on 50 Haircut Options and Best Hairstyles for Balding Men.
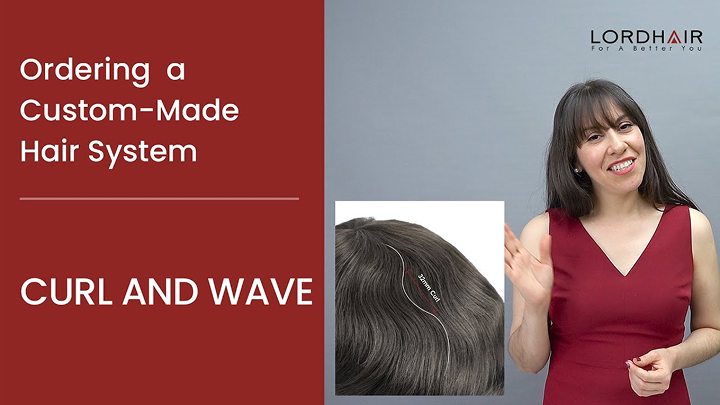
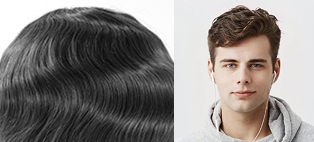
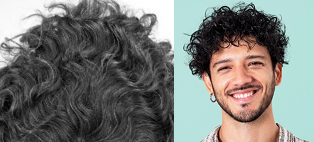
Hair System Styling Techniques: Curling, Perming, and Straightening
A hair system with real human hair brings real styling flexibility. Straight, wavy, curly - it's completely up to you. Here's how to get each look.
Curling a Hair System
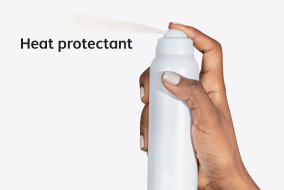
Curling your hair system is a great way to switch up your look. You can DIY at home with some simple tools, including heat protectant spray, curling tongs, and a wide-tooth comb. The curls may last until your next wash.
And here's how to do it:
- Make sure your hair system is completely dry before you start — this is really important.
- Preheat your curling tongs.
- Take one to two-inch sections of hair and wrap them around the tongs.
- Hold for about ten seconds, then gently release.
- Work your way through the whole head section by section.
- Once you're done, set the curls with a light hairspray for a more defined look. For a more relaxed curl look, use your hands to ruffle the curls out slightly. Do not use a brush as this will simply undo the curls or make them look frizzy. You can run a tiny amount of Moroccan oil through the ends to help it stay, and add moisture whilst adding some shine too.
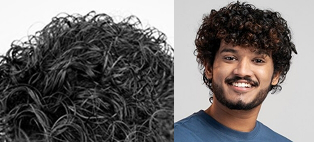
Perming a Hair System
If you want curls that are permanent and last the entire life of the system, a perm is the way to go. This is perfect if you have natural curly or Afro hair, or if you want curly hair and have never had it. Unlike a perm on your own hair that grows out over time, a perm on a hair system stays curly for as long as you wear it. No touch-ups needed.
Lordhair provides perm service for hair systems. Here's how to add it to your order:
For ready-to-wear systems: Select a ready-to-wear hair system. On the product page, scroll down to find the Perm Service under More Services. Choose your hair length from the pop-up, and confirm. Done.
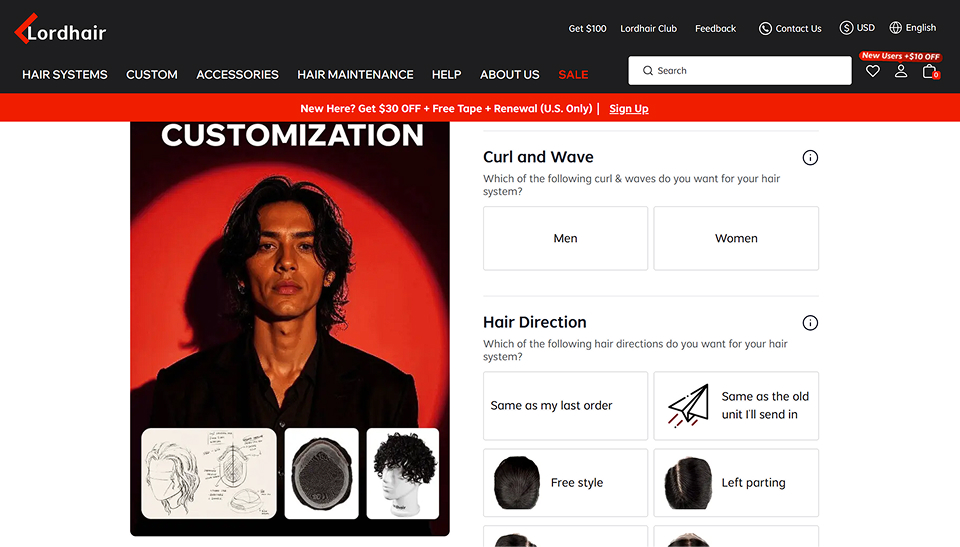
For custom systems: In the customization portal, select your curl type directly from the Curl and Wave option. You'll get a preview of how it looks.
The video below breaks down different types of curls you can choose for your toupee hair system with Lordhair and includes a number of tips on ordering a perm system.
Men's Curl and Wave Options
Here is a full breakdown of the different curl types you can find at Lordhair when choosing a perm.
Silky straight
Absolutely straight as a pencil. This is not a logical choice for 99% of all men's hairstyles because it will stick straight out if it is not long enough to create the weight to make it lay natural.
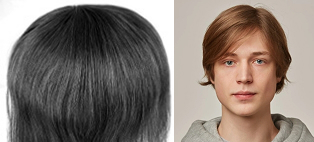
Natural straight
40mm rod size, it's not as straight as silky straight. If you like straight hair but not a very straight effect, then go for natural straight.
Body wave (36mm)
A 6" stock hairpiece with a 1-1/2 inch rod size will come up to approximately 3 inch waves. This very light bend will definitely not work well for a brush back style. When it is cut short, it will appear very straight.
Slight wave (32mm)
6" hair with a 1-inch rod size will generate approximately a 2-inch wave, light movement, or body will remain. When this is cut 2-1/2 inches or shorter, it will appear to be almost straight. Any wave curl less than this will not have a body.
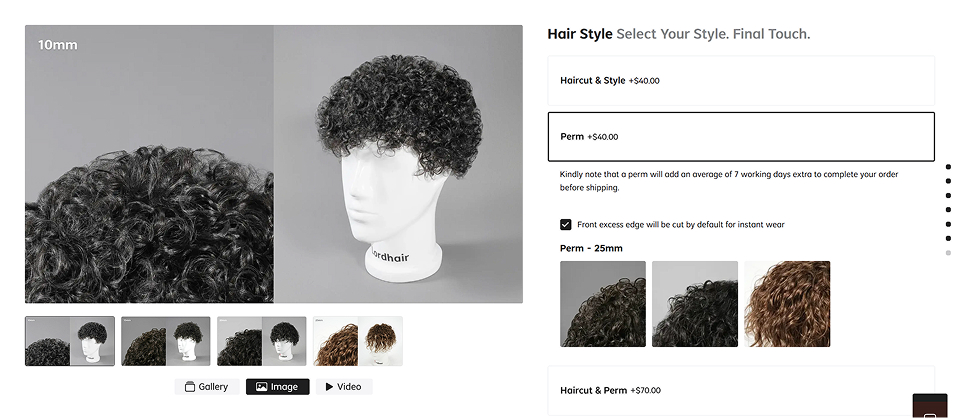
Medium wave (25mm)
6" hair with a 7/8 inch rod size will become approximately a 1-3/4 inch wave. This will be a light wave and is the most common wave used for the majority of styles. When this is cut two inches or shorter, there will only be light movement remaining.
Tight wave (20mm)
3/4 inch rod size will become approximately a 1-1/2 inch wave. Remember, if this is cut shorter than two inches, most of the curl is cut out. This can also be a wave or curl depending on the direction it dries. Wet it and scrunch into a curl or comb flatten into a wave.
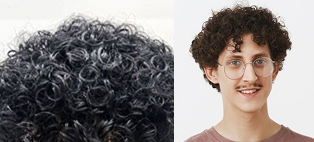
Loose curl (15mm)
5/8 inch rod size will become approximately 1-1/4 inch curl. Remember, if this is cut shorter than two inches, most of the curl is cut out. This can also be a wave or curl depending on the direction it dries. Wet it and scrunch into a curl or comb flatten into a wave.
Tight curl (10mm)
3/8 inch rod size is curly and will become a 3/4 inch curl, approximately the size of your thumb. This can be wave or curl, depending on the way it dries. Wet it and scrunch into a curl or comb flatten into a wave.
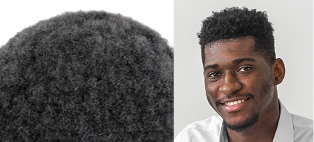
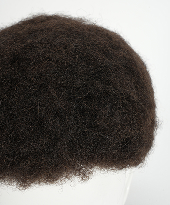
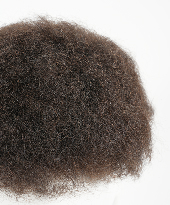
Extra-loose afro (8mm)
3/10 inch rod size is an extra loose afro curl and will become a 3/5 inch curl; it gives a fluffy afro look.
Loose afro (6mm)
1/4 inch rod size is a loose afro and will open to 1/2 inch curl, it's between extra-loose afro and medium afro.
Medium afro (4mm)
3/16 inch rod size is a slightly looser afro kink-curl and will open to 1/4 inch curl. This curl is also true to rod size.
Note: Hair length on the Lordhair website refers to the length of the strand when pulled straight, not when curled.
Why can't I order a hair system perm?
If you try to add the perm service to your order, but the portal will not let you, it may be because the base is too thin to support a tight perm, or the hair color will not be strong enough to take the perm.
Check the reference below to see the limitations when choosing a certain base, hair color, and perm type for your men's hair system.
Tightest Curl for Your Base
Some toupee bases are too delicate for a super tight curl or Afro. Check our reference and pick the right piece.
Smallest curl for the 0.03mm skin base?
- A 0.03mm base can be permed to a curl as tight as 10mm.
Smallest curl for the 0.06-0.1mm skin base?
- A 0.06mm, 0.08mm and 0.1mm base can be permed to a curl as tight as 4mm.
Perm and hair color limitations?
- Hair colors lighter than #6 should not be permed.
- Colors #18 and #22 cannot be permed.
Grey hair and perms
- 30% grey or more should not be Afro permed (4-8mm).
- 60% or more should not be permed to any level.
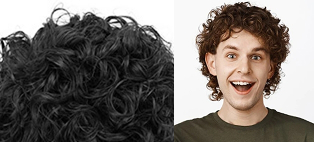
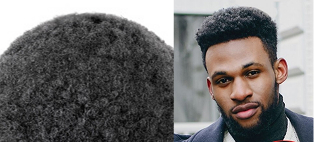
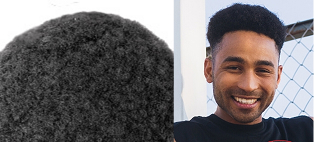
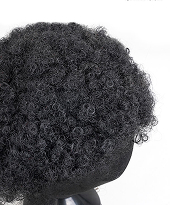
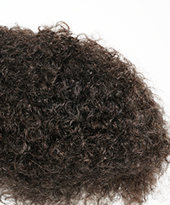
Afro Hair Systems and Man Weaves
Afro hair systems, often called man weaves, are hair systems made with Afro hair or hair that's been permed into an Afro texture. Styling works a little differently on Afro men's toupee, or man weave, so it's worth knowing what you're working with.
Watch this video, where expert Mario from Lordhair introduces Afro hair systems to you and explains what makes them different from our other men's hairpieces.
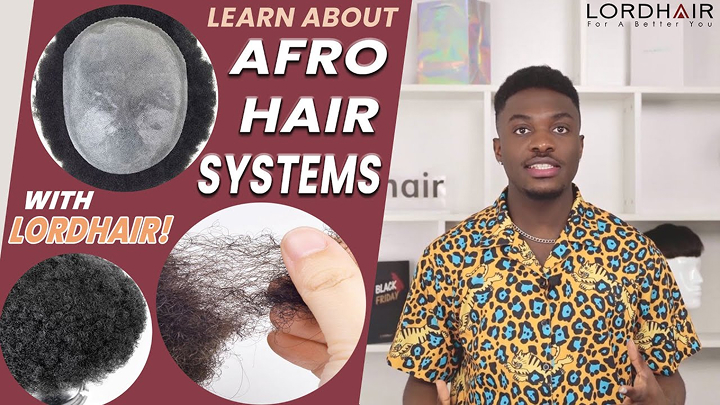
Natural Afro Hair Hair Systems
If you're going for a natural Afro look, a hair system makes it simple.
Instead of growing it out and maintaining it daily, you get a full, even shape right away. It arrives ready to wear, and once it's cut to your preference, it blends in naturally.
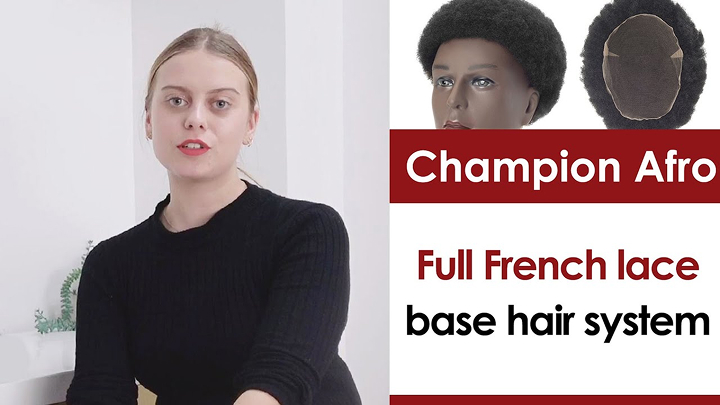
Check out Lordhair Afro Champion, Afro hair systems with breathable full French lace, for a great starting point.
Man Weave with Braids
You can even create braids with a man weave. Once the system is installed, you can take it to a stylist and have it braided just like natural hair. There's a lot of flexibility here.

Straightening a Hair System
Sometimes you will likely need to straighten your hair system. Although it isn't advisable to do it because of the heat involved, it's still doable. Here is a simple guide on how to straighten men's toupees.
What you'll need:
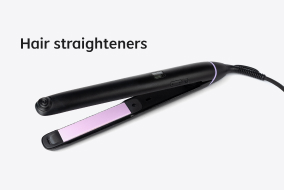
How to Straighten a Mens Hair System
- Ensure your hair system is fully dry and oil-free. If you need to blow-dry, use cool heat to minimize the damage.
- Brush through the hair using a wide-toothed comb, so it is tangle-free.
- Take small strips of your hair (1-2 inches) and run the straightening tool from root to tip, applying pressure
- Use a smooth, quick motion, avoiding using the heat on the hair for too long
- Each strip of hair should only need to be straightened once to achieve the desired effect
- You can adjust the direction of your fringe/bangs with your straightener, too
- Once you've completed all strips of hair, you can brush through the hair system again
- Finish off with a tiny bit of Moroccan oil at the ends or a leave-in conditioner to add some moisture back in.
Common Problems with Hair System Styling
No matter how careful you are with styling, you may still run into issues here or there. But don't stress, most problems have a really simple fix. Here is what to do with some common ones.
My Hair System Feels Dry
This one is super common. Use less heat when styling, and let your system air-dry, or use the cool heat of a hair dryer. Make sure you're applying leave-in conditioner to the ends. Hair care products designed for hair systems will keep your hair system better moisturized than regular shampoos and conditioners.
My Hair System Has Flyaways
Make sure you're conditioning after every wash. A deep treatment like RENEWAL works well for restoring moisture. Between washes, a daily spritz of leave-in conditioner REFRESH on the ends keeps the hair hydrated and much easier to manage.
My Hair System Won't Hold Its Style
A light mist of hairspray on the ends helps lock the style in place, but don't go with the cheap ones; it really does matter. If you want bouncy hair, avoid injected hair systems as they tend to sit flat.
My Hair System Keeps Tangling
Apply detangling spray after towel drying, before you style. Deep conditioning with a treatment mask after cleaning will do great help. If tangling keeps coming back, you may need to reconsider your maintenance routine. For detailed guidance, refer to the "How to Clean a Hair System" section in this guide.
My Hair System Just Doesn't Look Right
If your system looks fake or off, it usually comes down to a few things. Make sure the color and density match your natural hair. Get it cut so it blends properly with your bio hair. And go for a style that works naturally with your features. What looks amazing on one person won't necessarily work on another.
How to Protect & Prolong the Lifespan of a Hair System
A good hair system is an investment. How long it lasts depends on how well you look after it. Get the care right, and you will get every bit of value out of it. Get it wrong, and you'll be replacing it way sooner than you need to. Let me show you how to make it last.
How Long Do Hair Systems Actually Last?
Most hair systems last from one month to six months, depending on their base material and how well you maintain them.
- Lace base: A French lace hair system can typically last 2 to 4 months, and a Swiss lace system can last 1-2 months.
- Skin base: Thin skin hair systems can last 1-6 months with proper care. 0.02-0.03mm ultra-thin skin toupees last about 1 month. 0.06-0.10mm super thin skin hair systems last 2-4 months, thin skin bases of 0.1mm+ usually can last 3-6 months.
- Mono base: A mono base can last 3-6 months with proper care.
- Hybrid base: A hybrid base combines different materials. The lifespan of a hybrid base can vary depending on the materials used and how well it is cared for.
It's important to note that these are just general guidelines, and the actual lifespan of a hair system can vary depending on proper maintenance and care.
Common Problems That Affect Hair System Lifespan
Drying, tangling, shedding, base tearing, and color fading, most hair system wearers run into these problems at some point. In most cases, the problems are caused by improper care and habits in daily wear, not the quality of the system itself. Here we will discuss these issues one by one.
Drying
Hair systems don't get natural oils from your scalp, so they are easier to dry out. The key is to add the oil back and keep it moisturized. The fix is pretty simple: use hair care products made for hair systems. Deep condition with RENEWAL after every single wash, and keep a daily spritz of REFRESH to keep the moisture locked in and stop the hair from going brittle.
Tangling
Use a tangle teezer, which is much gentler than a regular brush and can get knots out without pulling hairs loose. Deep condition with RENEWAL and keep a daily spritz of REFRESH in your routine. Dry hair tangles faster, so maintaining moisture is the key to keeping tangles under control.
Shedding
You can't stop shedding completely; it's a natural part of wearing a hair system. But you can slow it down. Three things that make a real difference: a silk pillowcase, a Tangle Teezer, and cleaning the base regularly with RESET to remove adhesive buildup that weakens the hair knots over time.
Base Tearing
Tears on a hair system usually occur when you remove your hair system. If the base is stuck down really well, then removing it without assistance will be very difficult. In order to remove it safely, you will need to use a debonding agent. When it comes to removing a hair system, solvent is almost as important as glue is when attaching.
Color Fading
Color fading is inevitable over time, but you can slow it down. Use a gentle, sulfate-free shampoo made for colored hair, reduce using heat styling tools, wear a cap in direct sunlight, and avoid over-washing. If you swim regularly, rinse the hair thoroughly straight after to remove any chlorine or salt residue.
Daily Activities That Ruin Your Hair System (and How To Avoid Them)
Your hair system is delicate. Your daily wear causes wear and tear on your system in itself, but of course, no one buys a hair system to let it sit on a wig stand, do they?
Your hair system has a natural lifespan, as we've talked before. But if you slightly adjust your daily routine to be extra mindful and cautious when wearing a toupee, you can make your hair system last longer.
So it's about finding the right balance between living normally and being a little more mindful.
Washing and Cleaning
Washing too often does more harm than good. Generally, doing it every two weeks is good for most people. Over-washing strips moisture from the hair and wears the base down faster. If you're very active or sweat a lot, you might need to go a little sooner, but don't go overboard.
Regular shampoos are too harsh for hair systems. They dry the hair out and break down the base over time. Hair care products designed for hair systems can protect and extend your hair system in the long run.
Heat styling
Heat dries the hair out faster than almost anything else, so use it carefully.
If you use straighteners and curlers, always use a heat protectant and keep the heat low. If you use hair dryers, let the hair air dry to at least 70-80% first, then finish on low heat and add in a leave-in conditioner afterwards.
Swimming with a Hair System
Swimming with a toupee is something you can do, and no, it won't fall off. Swimming occasionally will not severely affect the life of your hair system. But if you go swimming every day, you may shorten the lifespan of your hairpiece. Chlorine and saltwater can dry the hair out and fade the color over time. After swimming, rinse your hair system immediately to make sure nothing's left sitting in the hair.

For detailed guidance on swimming with a hair system, read Can You Swim with a Hair System? Ultimate Guide to Keeping It Secure.
Working Out with a Hair System
If you are an active person who loves all kinds of sports, no problem. Gym, running, basketball... all fine. The system stays on. The main thing to watch is sweat buildup, since oils break down adhesive over time. Rinse after a heavy session and don't leave sweat sitting on the base for hours.
Additional tips that help regardless of what you do:
- Rinse after every session to clear sweat buildup
- Wear a sweatband to soak up moisture during workouts
- Wear a swim cap in the pool
Best Hair System Base for Sports
If you live an active life, a full lace system like the Lordhair Champion is worth it. Its breathable base ensures airflow and keeps your scalp comfortable during intense workouts.
Lace front hair systems also allow for a super natural hairline. Hairs on the lace base are not knotted uniformly, but more of a zig-zag shape along the front hairline, which mimics real hairlines. It offers an undetectable look even up close.
And if you're someone who sweats a lot, it's also worth looking into the antibacterial ZyroSen Champion. Sweat and heat create the perfect environment for bacteria to build up under the base, which causes odor and irritation over time. With the silver-ion technology, Lordhair ZyroSen antibacterial hair systems bring long-lasting freshness and comfort.
Going Outside in a Hair System
When you go out, wind, rain, and sun all wear on your hair over time. You can't avoid it completely, but you can minimize the impact.
- Wind — tie the hair back if it's longer, or pull up a hood
- Rain — use an umbrella. Avoid going out due to the change in humidity, which can cause frizz. Add moisture back in with a leave-in conditioner.
- Sun — wear a cap during peak heat. UV rays dry the hair out and fade the color faster than most people realize
Note: Hats are great for protecting your system from the sun, but pulling them on and off repeatedly creates friction and tension on the hair. Wear one when you actually need it, not as a daily fashion choice.

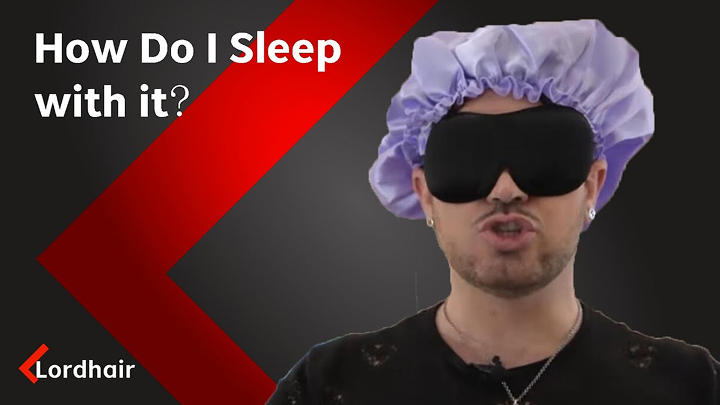
Sleeping in a Hair System
Sleeping is easy to cause damage to your hairpiece, and you may not even realize it. The easiest solution is to get a silk pillowcase. Not satin, real silk. It creates almost zero friction against the hair, so it causes less tangling and shedding than a regular pillowcase.
When you sleep, you will also experience sweating. Using a bandana while you sleep can help soak up some of the excess oils that come from your scalp at bedtime. As oils break down bonding, a bandana can help to soak them up immediately.
Before you go to sleep, dry your hair completely and brush it. Wet hair and tangles can create more pull during sleep. It is also advisable to create a noise-free and comfortable sleep environment, as less tossing and turning means less friction.
We covered a lot in this guide, and we really hope it helps you feel more confident in your hair system journey. Every wearer starts somewhere, and the fact that you're here learning this stuff already puts you in a great place. If you ever have questions, don't hesitate to reach out to the Lordhair team anytime at support@lordhair.com. We're always happy to help.
Video Tutorials on Hair System Maintenance and Care
If you're more of a visual learner, we've put together a whole series of video tutorials on hair system maintenance, covering different base types - skin, lace, and hybrid systems, with practical tips for better maintenance and longer wear. Go check them out. I think you're going to find them super helpful!