

How to Use Hair System Tape the Right Way
- Written by Maisie Martin
- | Published Aug 5, 2021
- | Updated Jul 30, 2026
- |
- 6 min read
 Listen to the full text
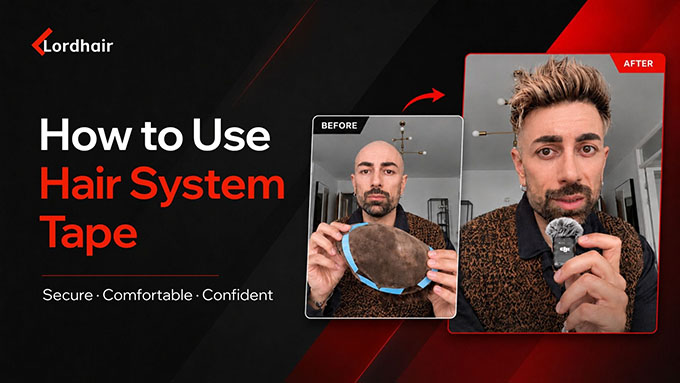
Getting a hair replacement system to look invisible and stay secure comes down to the right adhesive. Hair system tape is the go-to; it bonds the base directly to your skin. Learn to use toupee tape the right way and everything changes - no slips, no awkward moments, just a natural hairline. Before applying the adhesive, it is crucial to understand the different types of tape available and how they function.
Key Takeaways
- Choose daily-wear tape for quick removal or extended-wear for a multi-week hold.
- Prep with a scalp protector to block sweat, improve adhesion and prevent irritation.
- Leave small gaps between tape strips to allow water drainage when washing.
- Wait 24 hours for the adhesive to fully cure before showering or swimming.
- Never remove the system dry; apply an adhesive remover and wait 3-5 minutes before lifting.
Understanding Hair System Tape and Adhesion
Hair system adhesives rely on medical-grade acrylics or silicones designed to bond safely with human skin. The science of adhesion depends heavily on curing times, pressure and skin pH. When you press the tape down, your natural body heat activates the polymers, creating a flexible, water-resistant seal that moves with your scalp. Understanding these mechanics helps explain why proper preparation is non-negotiable. Choosing the right adhesive is the first step towards a successful application.
Tape or Glue, which one should you use?
If you're new to hair systems, this is usually one of the first questions that you have. Glue gives you a strong bond and a more natural hairline, but it takes practice. And it's not a good match for lace or mono bases since it seeps into the mesh and causes shedding over time. Tape is the easier starting point. It's simple to apply, quick to remove, and sits on top of the base instead of soaking into it, making it the better choice for lace and mono systems.
Tape is a better choice during summer heat too. Glue tends to break down faster in heat, making the edges lift sooner. Tape, especially a waterproof option, holds up better under those conditions and is easier to check and touch up throughout the day. With that in mind, let's look at the different types of tape and how to pick the right one for your system.
Different Types of Toupee Tape for Your Needs
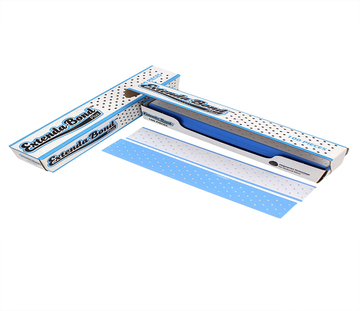
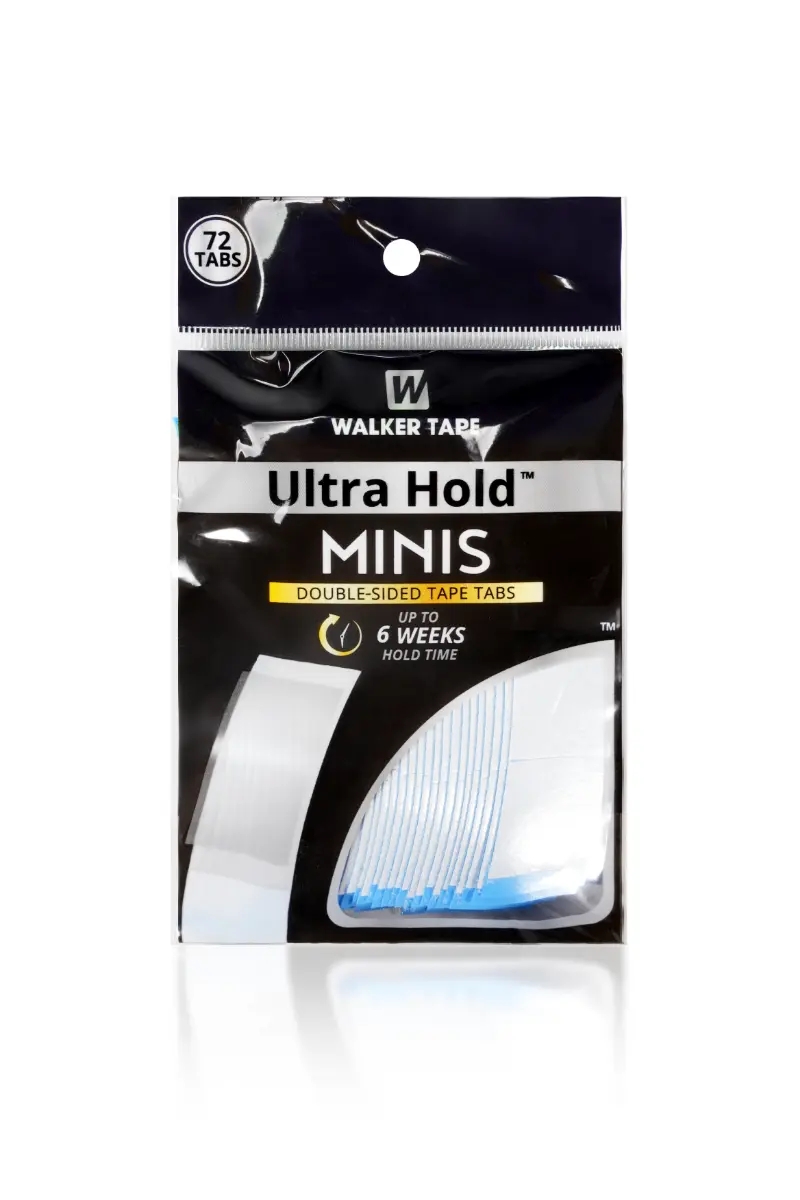
Not all tapes are built the same, so you’ll want one that fits your routine. Daily wear tapes are made for easy removal and quick cleanup. They’re great if you take your system off at night. Extended wear options, like Lordhair’s Ultra Hold Mini double-sided tape tabs, are designed for long-term use and can last three to four weeks.
A solid toupee tape application guide always factors in lifestyle. If you’re active, sweat a lot, or just don’t want to deal with daily removal, extended wear is the better pick. If you prefer flexibility and quick changes, daily tape works best.
Discussing the specific benefits of hair system tape options ensures you match the adhesive to your daily habits.
How is a Toupee Attached Safely to the Scalp?
So, how is a toupee attached safely without damaging your skin? It comes down to a clean bond. Each adhesive strip has two sides: one sticks to the base material (lace, skin or mono), and the other sticks directly to your scalp. When pressed together, they create a flat and secure seal.
As you learn the taping process, you’ll notice that pressure and body heat help activate the adhesive. Over the next 24 hours, the bond continues to set. That curing time is what makes it resistant to sweat and water. But none of that works if your skin isn’t properly prepped. Clean skin is non-negotiable here which brings us to the physical preparation of the skin.
Preparing Your Scalp and Hairpiece for Application
You might be asking how a toupee is attached so it can handle wind, sweat and everyday movement. The answer is simple: medical-grade double-sided adhesive. These tapes grip both the base of your unit and your skin at the same time. Good hairpiece tape tips make a big difference here. You can’t just use any tape and expect it to hold. Thickness, shape and strength all play a role. Prep is everything. Oily skin or leftover residue will ruin even the best of tapes. With a clean surface, you can move on to the precise placement of the tape.
Cleaning the Hair System Base
You should always apply hair system tape to a perfectly clean base. New units are usually ready to go but it still helps to wipe them with a bit of rubbing alcohol to remove dust and residue. If you’re reusing a system, you need to be more thorough.
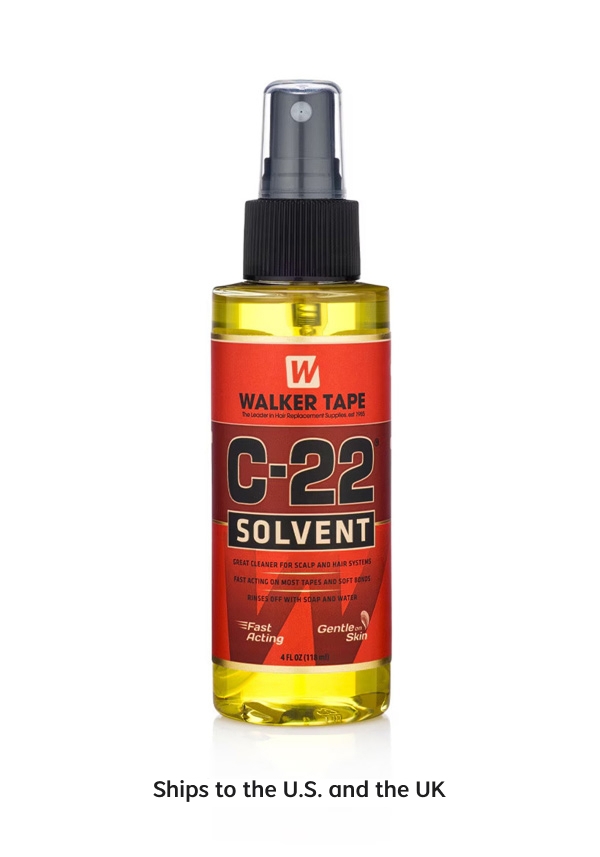
- Start by removing old adhesives with a specific adhesive removing solvent.
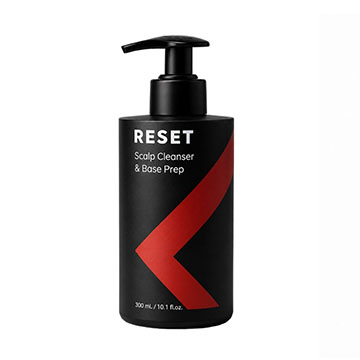
- Then wash the base using a hair system shampoo.
- Rinse until the water runs clear and there’s no sticky feeling left.
- Let it air dry completely, we always recommend placing it onto a wig-stand for this step to ensure the shape holds. Even a small amount of moisture can weaken the bond so it is better to leave it to dry for as long as possible. The importance of a dry surface cannot be overstated when aiming for a flawless hold.
Using a Scalp Protector
Your scalp naturally produces oils and sweat, which can break down adhesive faster than you’d expect. A scalp protector can help with this condition. It acts like a barrier between your skin and the tape.
Apply it directly to the area where the system will sit. It dries quickly and becomes a thin protective layer. This helps the tape stick better and reduces irritation at the same time. Proper scalp protector use keeps both your skin and your bond in good shape, moving you smoothly on to the actual tape placement.
Step-by-Step Toupee Tape Application Guide
If you’re wondering exactly how to use toupee tape for a flawless finish, this guide walks you through the process step by step. Take it slow - rushing often leads to uneven placement or trapped air. Mastering this technique isn't just about sticking it down; it’s about control, alignment and patience. Start with the sides and back then move to the front once everything else is secure. Once the tape is on the unit or scalp, the focus shifts to the alignment on the head.
1. Applying Tape to the Perimeter and Temples
- Take your tape tabs and peel off one side of the backing.
- Press that side onto the perimeter of the hair system. Work your way around the back and sides but leave the front hairline untouched for now.
- Make sure you apply the hair system tape evenly. Don’t overlap strips and leave small gaps between them so water can drain when you wash your hair.
- Once everything is in place, remove the top backing layer. Now the adhesive is exposed and ready.
2. Securing the Lordhair System for a Natural Fit
- Positioning takes a bit of practice so don’t rush it. Hold the system above your head and line up the front edge with your natural hairline.
- Lightly press the front down to anchor it.
- Slowly roll the system backwards over your scalp. Keep slight tension on the base as you do this, it helps prevent wrinkles and air bubbles. Check that no air gets trapped underneath.
- Once the back and sides make contact, press firmly. Heat from your scalp helps activate the adhesive. This step locks everything into place, allowing you to start focusing on the most visible part; the hairline.
Perfecting the Front Hairline and Finishing
The front hairline is where everything shows. If it’s off, people notice. If it’s done right, it's practically invisible.
You want a clean edge, proper alignment and careful pressure.
The technique is slightly different from the rest of the system, so take your time and be precise. Maintenance is key to making the bond last for weeks but it all starts with a perfect front application.
1. Using Guide Marks for Precise Placement
- Don’t guess your hairline. Use a makeup pencil to place small dots on your forehead as guides. These marks show exactly where the front should sit. Typically, your hairline starts at four fingers above your eyebrows.
- Keep the marks just below the tape area so they don’t interfere with adhesion. Once marked, apply the final tape piece just behind those dots.
- Peel off the backing; you now have a clear placement zone. This small step makes a big difference in applying the unit with accuracy, setting you up for final pressing and styling.
2. Final Bonding and Styling Techniques
- Gently pull the front hairline forward and press it onto the exposed tape. Avoid using your fingers here - skin oils will weaken the bond. Instead, use the back edge of a comb or brush.
- Press firmly along the hairline to secure it. This gives you even pressure without contamination.
- Once everything is set, style your hair as usual.
- The bond will continue to strengthen over the next several hours. For best results, leave it undisturbed as much as possible during that time. This smooth transition to long-term care and removal ensures your system stays undetectable.
Maintenance and Safe Tape Removal
At some point, the tape will need to come off. Doing it the wrong way can damage both your scalp and the hair system.
Following proper hairpiece tape tips during removal keeps everything intact.
Understanding the lifecycle of the adhesive means knowing how to remove it safely and cleanly. Selecting the right products for the next cycle guarantees your hair system stays in pristine condition.
When to Replace Your Toupee Tape
People often ask how a hair system is attached for weeks without failing. The answer is a strong adhesive but even then it has its limits.
Most extended-wear tapes last between two and four weeks. Sweat and oils gradually weaken the bond. You’ll notice signs when it’s time to replace them: lifting edges, a loose feel, or buildup turning sticky.
Don’t wait too long. Old tape becomes messy and harder to clean. Staying on schedule is part of managing your hair system the right way, ensuring safe solvent use when it’s time for a change.
How to Remove Tape Without Damaging the Base
- Never pull the system off dry. Always apply hair system tape solvent first. A citrus based remover such as Walker C-22 works well.
- Spray it along the edges and let it sit for 3-5 minutes. The adhesive will start to break down and loosen.
- Gently lift the system - if it resists, apply more solvent and wait a bit longer.
- Once removed, clean any leftover residue with more solvent and cotton wool or a soft wipe. Take your time here. Careful removal keeps both your scalp and the base in good condition, leaving you ready for your next application.
For a comprehensive introduction of hair system wearing and maintenance, refer to Hair System Maintenance: A Complete Guide.
Conclusion
Using toupee tape gets easier every time you do it. Clean your hairpiece, prep your scalp, place the tape around the edges, and take your time getting the front hairline just right. Once you've done it a few times, it will become part of your routine.
Explore the full range of hair system tapes.
Still not sure which type of tape fits your system best? Contact us for a free consultation.

FAQs
Can I shower or swim with toupee tape?
Yes, you can. Once you apply hair system tape and give it 24 hours to fully cure, it becomes waterproof. Showering and swimming are fine. Just avoid heavy conditioners at the roots and pat your hair dry instead of rubbing it harshly.
Which hair system tape is best for sensitive skin?
If your skin reacts easily, go for hypoallergenic options. They’re made to be gentler while still providing a solid bond. Proper scalp protector use also helps create a barrier that prevents irritation. Testing a small patch first is always a smart move.
How do I prevent the tape from melting in hot weather?
Heat and sweat can weaken adhesive, but prep makes a big difference. Use stronger, high-temperature tapes and double up on the scalp protector if needed. Tapes such as SUPERTAPE do not melt down as quickly.
Does tape look as natural as glue?
Once it's applied correctly and the hair is blended, most people won't notice the difference. Glue has a slight edge for an undetectable hairline, but a well-applied tape job gives a natural look just as well in everyday situations.
How long does hair system tape actually last before I need to reapply?
On average, a hair system needs to be reapplied every 2 weeks. Daily wear, sweat, and how you care for your hairpiece all affect how long it lasts.