How to Take Base Measurements for a Hair System: Step by Step
- Written by Maisie Martin
- | Published Sep 29, 2026
- |
- 4 min read
 Listen to the full text
Base size is an important specification for a hair system. Most existing customers know how to take measurements and provide the correct base size. However, some new customers are not familiar with what measurements they need to provide.
The sizes of hair systems can vary and the area of people's hair loss will also vary. To wear your hair system with style and confidence, you need to make sure it fits just right. To find the right base size for your head, you first need to know some basic measurements. The more exact your measurements are, the better your hair system fits. This blog will explain how to measure your specific area of hair loss for the best fit.

Key Takeaways
- There are three ways to get your base size: measure an existing hair system, measure your head directly, or make a template.
- A template is the most accurate because it captures both the size and the curve of your scalp.
- A topper or partial system needs only two numbers: width (side to side) and length (front hairline to back edge).
- A custom full cap needs seven measurements if you don't send a template.
- Measure at least three times. If you get the same number each time, you can trust it.
Before Measuring
The first step to measure your head for a replacement system is to comb down your existing hair neatly so that you can clearly see the hair loss region.
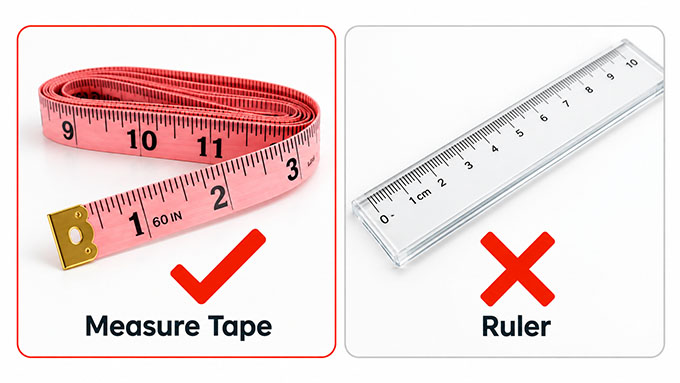
Please use a soft measuring tape rather than a straight ruler.
Measuring an Existing Hair System
The first way of taking measurements for hair loss is by measuring an existing hair system.
- Place the hair system on a wig stand, with the base on top, making sure there are no folds.
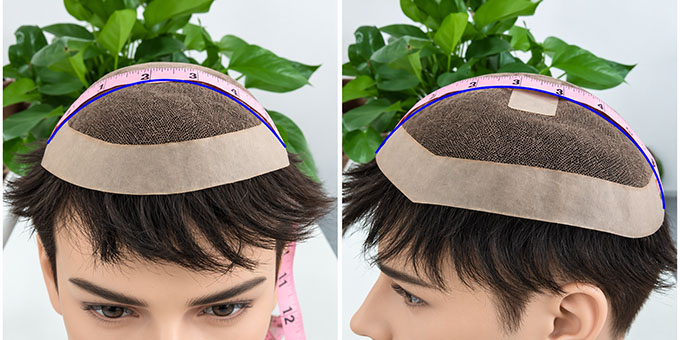
- To Measure the Width: Place the tape measure at one side edge of the base, just back from the temple. Measure across the top to the opposite edge.
- To Measure the Length: Place the tape measure at the center of the front hairline. Measure directly over the middle of the base to the back edge.
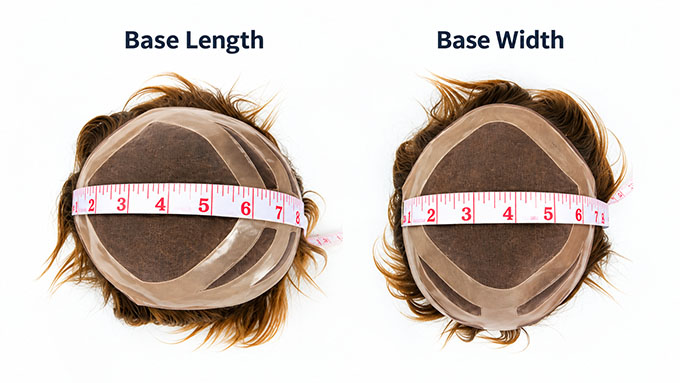
The right tools can make your measuring accurate and easier.
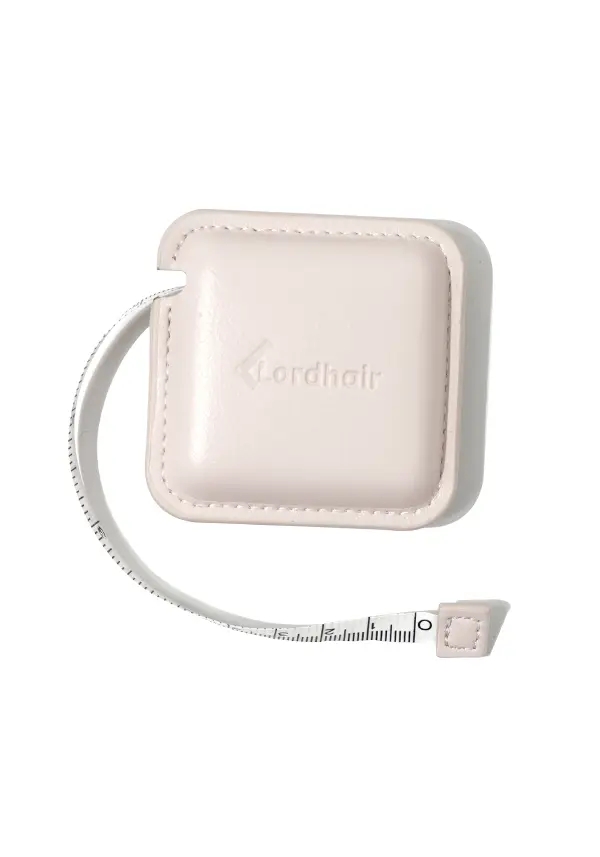
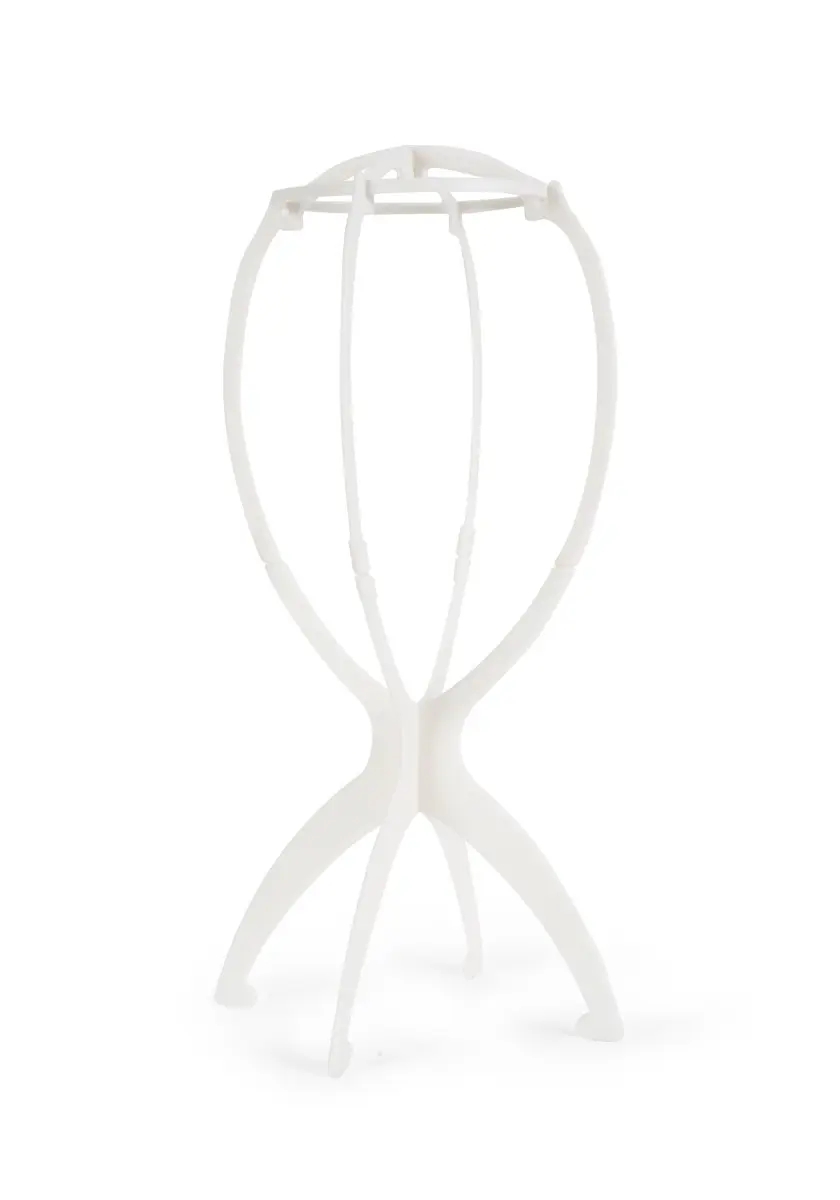
How to Take Base Measurements From Your Head:
For a Hair System Topper:
Width” x Length”

This is the same process as measuring from an existing hair system. You will need a Width measurement from one side to the other and a Length measurement from front to back.
You can measure along with our salon professional. This video tutorial shows her measuring a client. You may find it helpful for someone else to measure your head this way to get the most accurate measurements:
For a Custom Full Cap System:
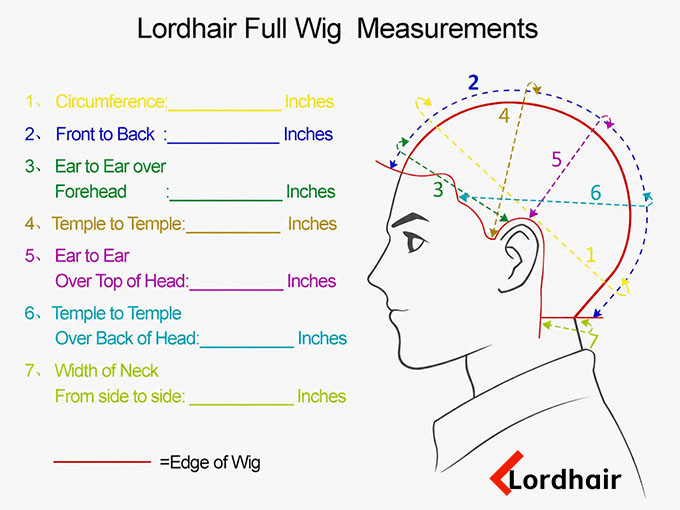
If you order a full cap wig for men (and don’t send in a template), more measurements are necessary - 7 in total. Below is a picture showing the measurements that are needed for a full cap wig, followed by an explanation for each.
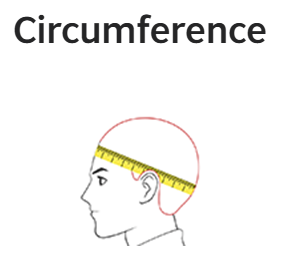
This measures the distance around your head.
- Starting at the center of the front hairline, place the tape flat against your head, going just above the ear towards the back of the head.
- Keeping the tape at the nape of your neck and going around to the opposite side of your head, just above the opposite ear and returning to the center of the front hairline.
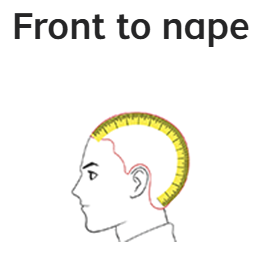
- Place the tape at the center of the front hairline
- Measure directly over the top of your head in the middle from the front to the nape of your neck (the nape of your neck is where the hair system will come down to).
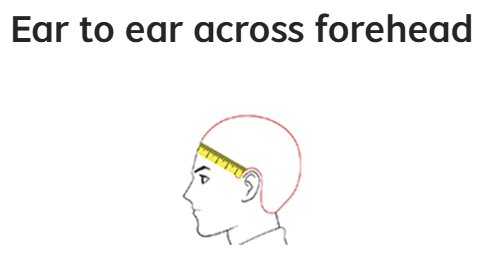
- Place the tape at your temple, just in front of your ear.
- Measure from the hairline at the base of your sideburn, go up across the hair line along your forehead to the same point in front of the opposite ear.
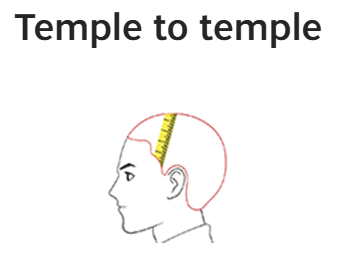
This is the same as a Width measurement for a topper. Over the top of the head (sideburn to sideburn).
Place the tape at the bottom edge of the sideburn in front of your ear and go directly across the top of head to the bottom edge of the opposite sideburn.
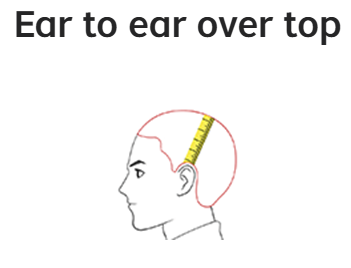
Place the tape from the hairline edge at the top of your ear and go directly across the top of your head to the hairline edge at the top of the opposite ear.

- Place the tape against your head at the front edge of the hairline (temple area).
- Go around the head above the occipital bone (the part that sticks out slightly at the back of the skull) to the opposite front edge of the hairline (the opposite temple area).
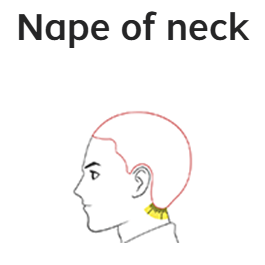
This measures the width of the hairline across the nape of the neck.
Place the tape at the lowest point on the bone behind your ear (mastoid bone) and measure across the neck to the opposite mastoid bone.
Measure along with our salon professional here:
How to Make a Base Template
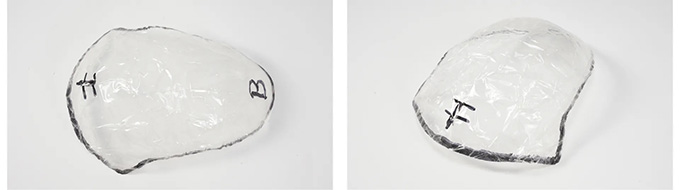
The most accurate and preferred method for taking base measurements is to make a template and send it to us for a production reference. The template not only copies the size, but also the curvature making the completed hair system fit like a glove.
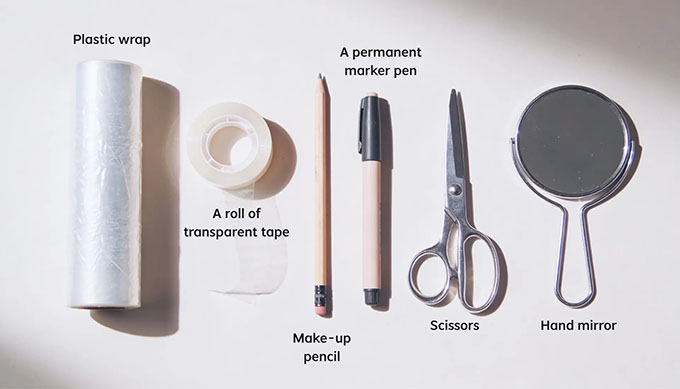
What You Will Need:
- Plastic Wrap
- Roll of Tape (transparent)
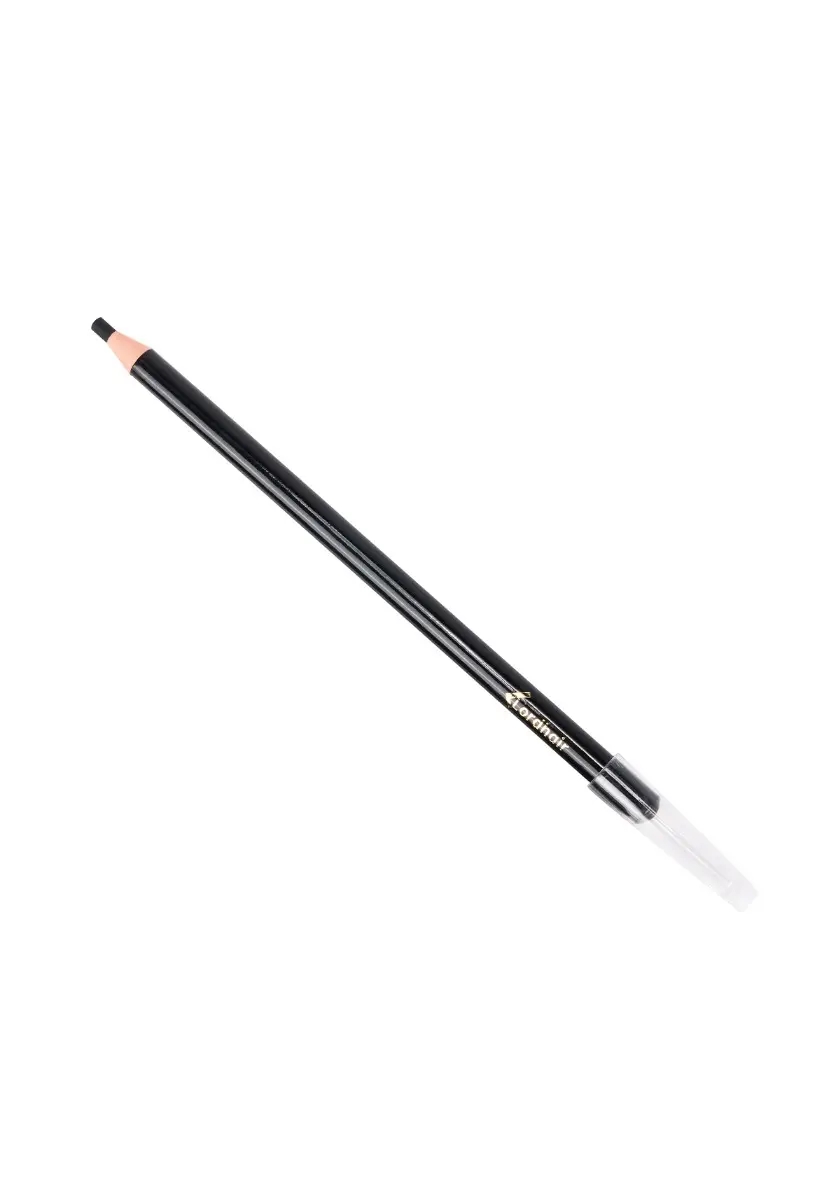
- Makeup Pencil
- Permanent Marker
- Scissors
- Hand Mirror
Step-by-Step Guide:
- Using the Makeup Pencil, draw yourself a front hairline from temple to temple. This can be wherever you want it to be but for the most natural look it is best to match where your old natural hairline used to be. Another method is to place 3-4 fingers on your forehead with your pinky finger resting just above the eyebrows. A hairline with a deeper recession looks the most natural compared to one that is too straight across. Use rubbing alcohol or makeup remover to erase the line if you need to try again.
- Spray some water directly onto the head to dampen the scalp.
- Tear a 12” wide strip of plastic wrap long enough to cover your entire head and tie under your chin (like a bonnet).
- Place the wrap on your head and press down tightly. Tie it under your chin in order to keep the wrap secure.
- Use the tape to contour the head shape. The tape will lock the plastic wrap into a permanent transparent tape template of your scalp. Apply three layers of tape. Begin with the first layer going from FRONT TO BACK then overlap the second layer going SIDE TO SIDE and the final layer should be FRONT TO BACK again. Please do not untie the plastic wrap from under the chin until the last step is finished.
- While the plastic wrap is still on your head, using a permanent marker, trace the outline of the area you are wanting to cover.
- Again using the permanent marker, draw arrows to show which direction you would like the hair to go in. For example, if you would like a parting, draw this line on from the crown at the back all the way forward to the front hairline.
- Next draw an ‘F’ at the front of the template and a ‘B’ at the back. Also write your name and if you already have one, your order number directly onto the template.
- Place one more layer of the transparent tape going from SIDE TO SIDE. This should seal and protect the markings.
- Carefully untie and remove the template from your head. You can now use a pair of scissors to cut the excess plastic wrap along the outer perimeter line that you drew.
- Place your completed template back on the bald area of your head to ensure it's the correct size and shape and you're done!
Measure along with our salon professionals here:
Helpful Tips for Taking Correct Measurements:
- Use cloth measuring tape.
- Measure holding the tape snug, but not tight against the head.
- Keep tape flat against your head and do not allow kinks and twists to develop in the tape.
- Take the measurements at least 3 times with the same tape to ensure accuracy. Consistent measurements are an indication that you are measuring correctly. If you do not measure properly, your hair system may not fit.
What to Be Careful of When Finding Your Hair System Size
Base Measurements: Final Words
Using the width & base measurements provided by you, we will make your system base on a regular scalp curvature. However, the best way to get your exact base size is by sending in a template or spare system, which is helpful for us to examine the pattern, size, and scalp curvature of your hair loss area so that we can follow these details exactly when making your customized system.
If you need any further help with taking your base measurements. Our experts will be more than happy to assist you. Contact us for a free consultation.

FAQs
What measurements do I need for a hair system?
For a topper or partial unit, you need width and length in inches. For a full cap system, you need seven: circumference, front to nape, ear to ear across the forehead, sideburn to sideburn, ear to ear over the top, temple to temple around the back, and nape width.
Is a template better than measurements?
Yes. Width and length only tell us the size, so we build the base on a standard scalp curve. A template also shows the exact shape and curvature of your head, so the finished system sits flatter and fits more closely.
Can I measure my own head, or do I need help?
You can do it yourself with a mirror, but it's easier and more accurate with a second person. This matters most for back-of-head measurements and for template making.
Do I need to re-measure every time I reorder?
Not if your hair loss area hasn't changed. If you've noticed more thinning, or your last system felt tight or left gaps at the edges, measure again or send a new template.
Where should I draw my hairline?
Most men get the most natural result by matching where their old hairline used to be. A good starting point is three to four fingers above the eyebrows. A slightly receded hairline looks more natural than a straight, low one.