
Base Templates and Hair Samples

How to make a base template?
Items required:
• Plastic wrap • A roll of transparent tape • Make up pencil • A permanent marker pen • Scissors • Hand mirror
-
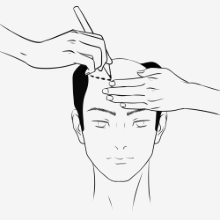
Step 1.
Outline a natural-looking hairline on your skin using a makeup pencil, starting from temple to temple. To find the right placement, rest three or four fingers on your forehead, your hairline should start where your index finger lands when your eyebrows are raised. A hairline with deeper recession appears more natural. If necessary, adjust the line with rubbing alcohol.
-
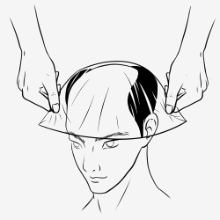
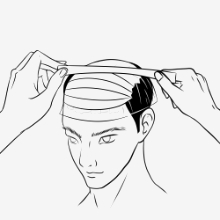
Step 2.
Dampen your scalp with water. Then, cut a strip of plastic wrap, wide and long enough to cover your head and tie under your chin like a bonnet. After placing the wrap tightly on your head and securing it, use transparent tape to outline the bald area on your scalp. This helps in determining the exact area for the hair system.
-
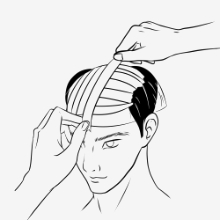
Step 3.
Apply three layers of tape: the first from front to back, the second side to side, and the third again from front to back. It's important to keep the plastic wrap tied under the chin throughout this process until completion.
-
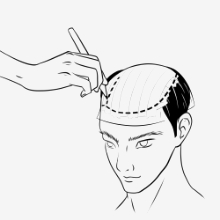
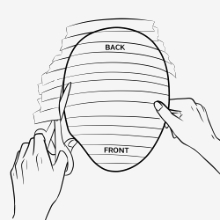
Step 4.
While the plastic wrap is on your head, use a permanent marker to trace the hairlines on the tape template, covering the bald area. This creates the shape for your hair system base. Indicate the desired hair direction and, if needed, draw a parting line from the back crown to the front hairline. Mark the template with “F” for front, “B” for back, and add your name and order number for identification.
-
Step 5.
Upon finishing marking the tape template, place one more layer of the transparent tape going from side to side. This should seal and protect the markings. Now your template is complete.
-
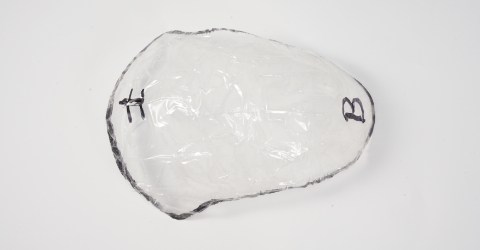
Step 6.
After drawing the template on your head, carefully remove it, trim excess plastic along the drawn perimeter, and check it against your bald area for correct size and shape. This completes the creation of your tape template.
Below is an example of template:

View Our Video
How to take hair sample?
For the best color match, it's ideal to provide a small bunch of hair, around 2-3 inches in length. The more hair provided, the easier it is to determine the correct color.
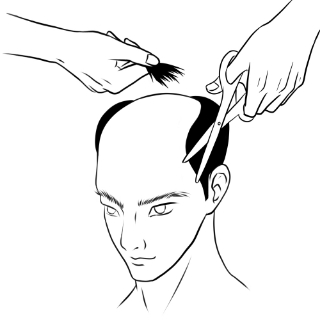
If your hair is the same color all over, please just provide one sample. However, If your hair varies in color (like more grey on the sides), take samples from 3-6 different areas:
the front hairline or bangs, the top front, the crown, temples, sides above the ear, and the center back of the head. This ensures an accurate representation of all your hair colors.
Below is an example of hair samples:
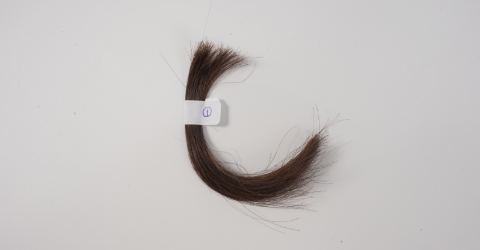

NOTE: When providing hair samples, cut from each specified area and label them according to their origin (e.g., front, top, sides, etc.). It's important to use clean hair for the samples, as dirty hair might not accurately represent its true color.
For more information or to arrange a pick-up, please contact our customer support team.